考试系统:修改密码、试卷列表页面
这节继续来写修改密码页面,还有试卷列表页面:
首先是修改密码的页面 src/pages/UpdatePassword:
import { Button, Form, Input, message } from "antd";
import { useForm } from "antd/es/form/Form";
import "./index.css";
import { useCallback } from "react";
import { Link, useNavigate } from "react-router-dom";
export interface UpdatePassword {
email: string;
captcha: string;
password: string;
confirmPassword: string;
}
const layout1 = {
labelCol: { span: 6 },
wrapperCol: { span: 18 },
};
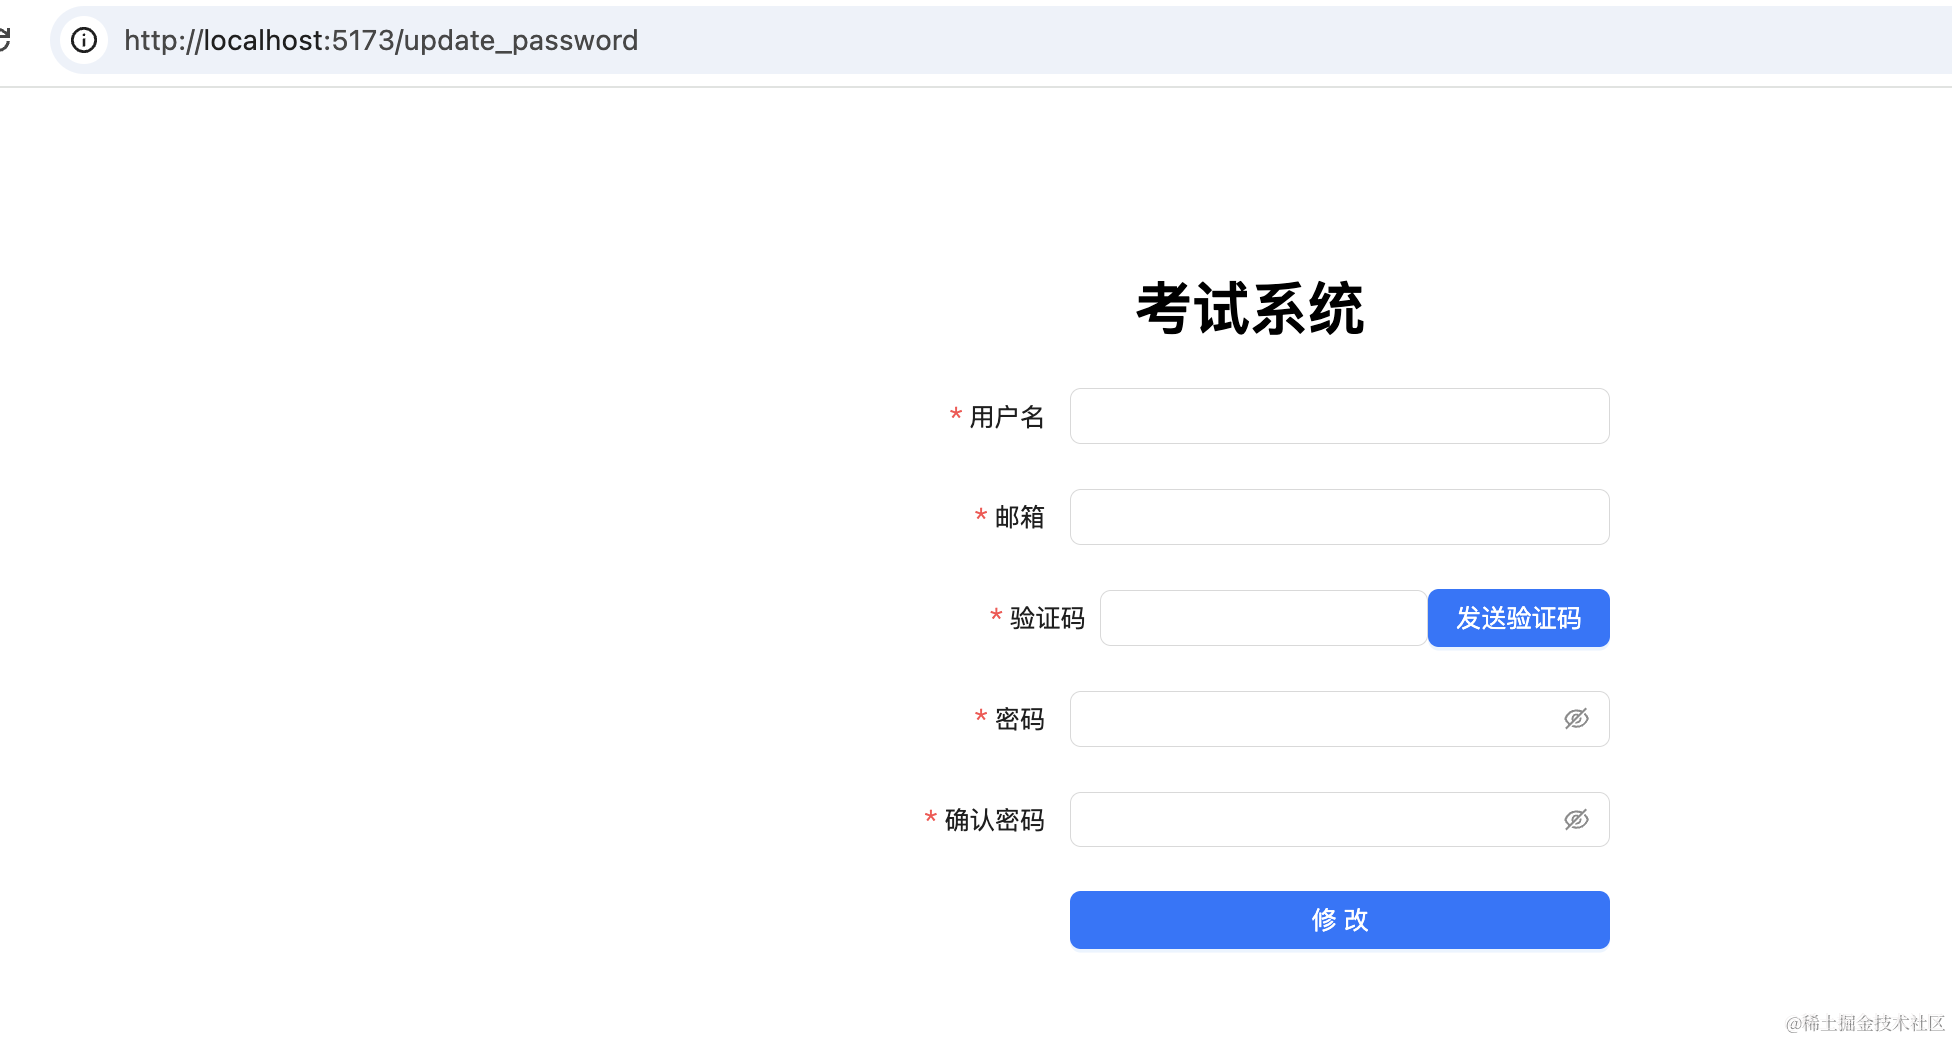
export function UpdatePassword() {
const [form] = useForm();
const navigate = useNavigate();
const onFinish = async (values: UpdatePassword) => {
console.log(values);
};
const sendCaptcha = async function () {
console.log("send captcha");
};
return (
<div id="updatePassword-container">
<h1>考试系统</h1>
<Form
form={form}
{...layout1}
onFinish={onFinish}
colon={false}
autoComplete="off">
<Form.Item
label="用户名"
name="username"
rules={[{ required: true, message: "请输入用户名!" }]}>
<Input />
</Form.Item>
<Form.Item
label="邮箱"
name="email"
rules={[
{ required: true, message: "请输入邮箱!" },
{ type: "email", message: "请输入合法邮箱地址!" },
]}>
<Input />
</Form.Item>
<div className="captcha-wrapper">
<Form.Item
label="验证码"
name="captcha"
rules={[{ required: true, message: "请输入验证码!" }]}>
<Input />
</Form.Item>
<Button type="primary" onClick={sendCaptcha}>
发送验证码
</Button>
</div>
<Form.Item
label="密码"
name="password"
rules={[{ required: true, message: "请输入密码!" }]}>
<Input.Password />
</Form.Item>
<Form.Item
label="确认密码"
name="confirmPassword"
rules={[{ required: true, message: "请输入确认密码!" }]}>
<Input.Password />
</Form.Item>
<Form.Item {...layout1} label=" ">
<Button className="btn" type="primary" htmlType="submit">
修改
</Button>
</Form.Item>
</Form>
</div>
);
}
css 部分如下:
#updatePassword-container {
    width: 400px;
    margin: 100px auto 0 auto;
    text-align: center;
}
#updatePassword-container .btn {
    width: 100%;
}
#updatePassword-container .captcha-wrapper {
    display: flex;
    justify-content: flex-end;
}
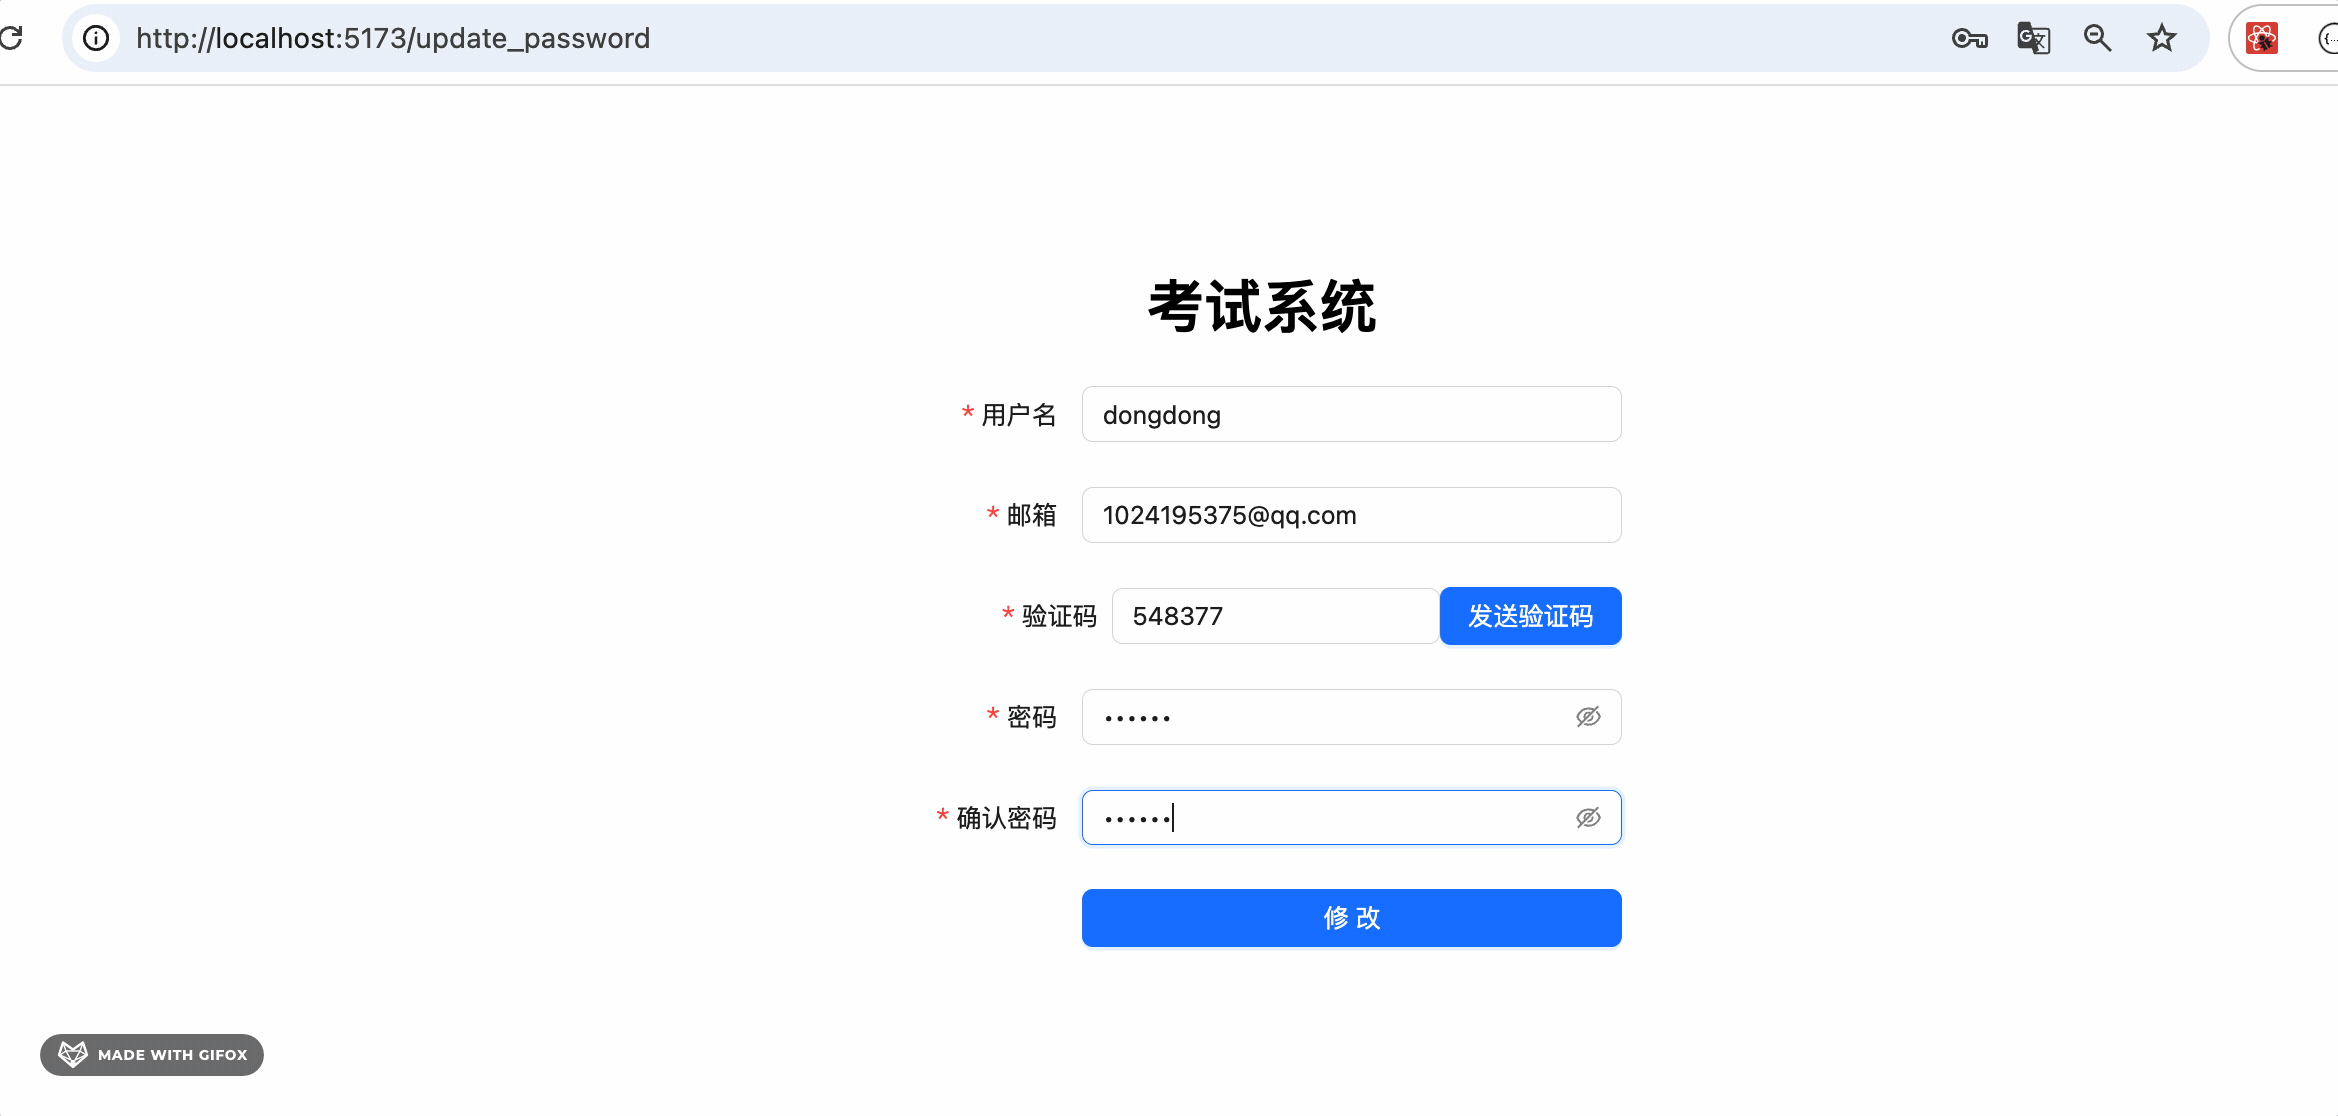
跑起来是这样的:
然后再调用下后端接口。
在 interfaces 添加这两个接口:
export async function updatePasswordCaptcha(email: string) {
    return await userServiceInstance.get("/user/update_password/captcha", {
        params: {
            address: email,
        },
    });
}

export async function updatePassword(data: UpdatePassword) {
    return await userServiceInstance.post("/user/update_password", data);
}
更改密码页面里调用下:
const sendCaptcha = async function () {
    const address = form.getFieldValue("email");
    if (!address) {
        return message.error("请输入邮箱地址");
    }

    try {
        const res = await updatePasswordCaptcha(address);
        if (res.status === 201 || res.status === 200) {
            message.success("发送成功");
        }
    } catch (e: any) {
        message.error(e.response?.data?.message || "系统繁忙,请稍后再试");
    }
};
发送验证码接口的调用逻辑和注册时一模一样。
更改密码接口的调用逻辑也和注册差不多:
const onFinish = async (values: UpdatePassword) => {
    if (values.password !== values.confirmPassword) {
        return message.error("两次密码不一致");
    }
    try {
        const res = await updatePassword(values);

        if (res.status === 201 || res.status === 200) {
            message.success("密码修改成功");
            setTimeout(() => {
                navigate("/login");
            }, 1500);
        }
    } catch (e: any) {
        message.error(e.response?.data?.message || "系统繁忙,请稍后再试");
    }
};
测试下:
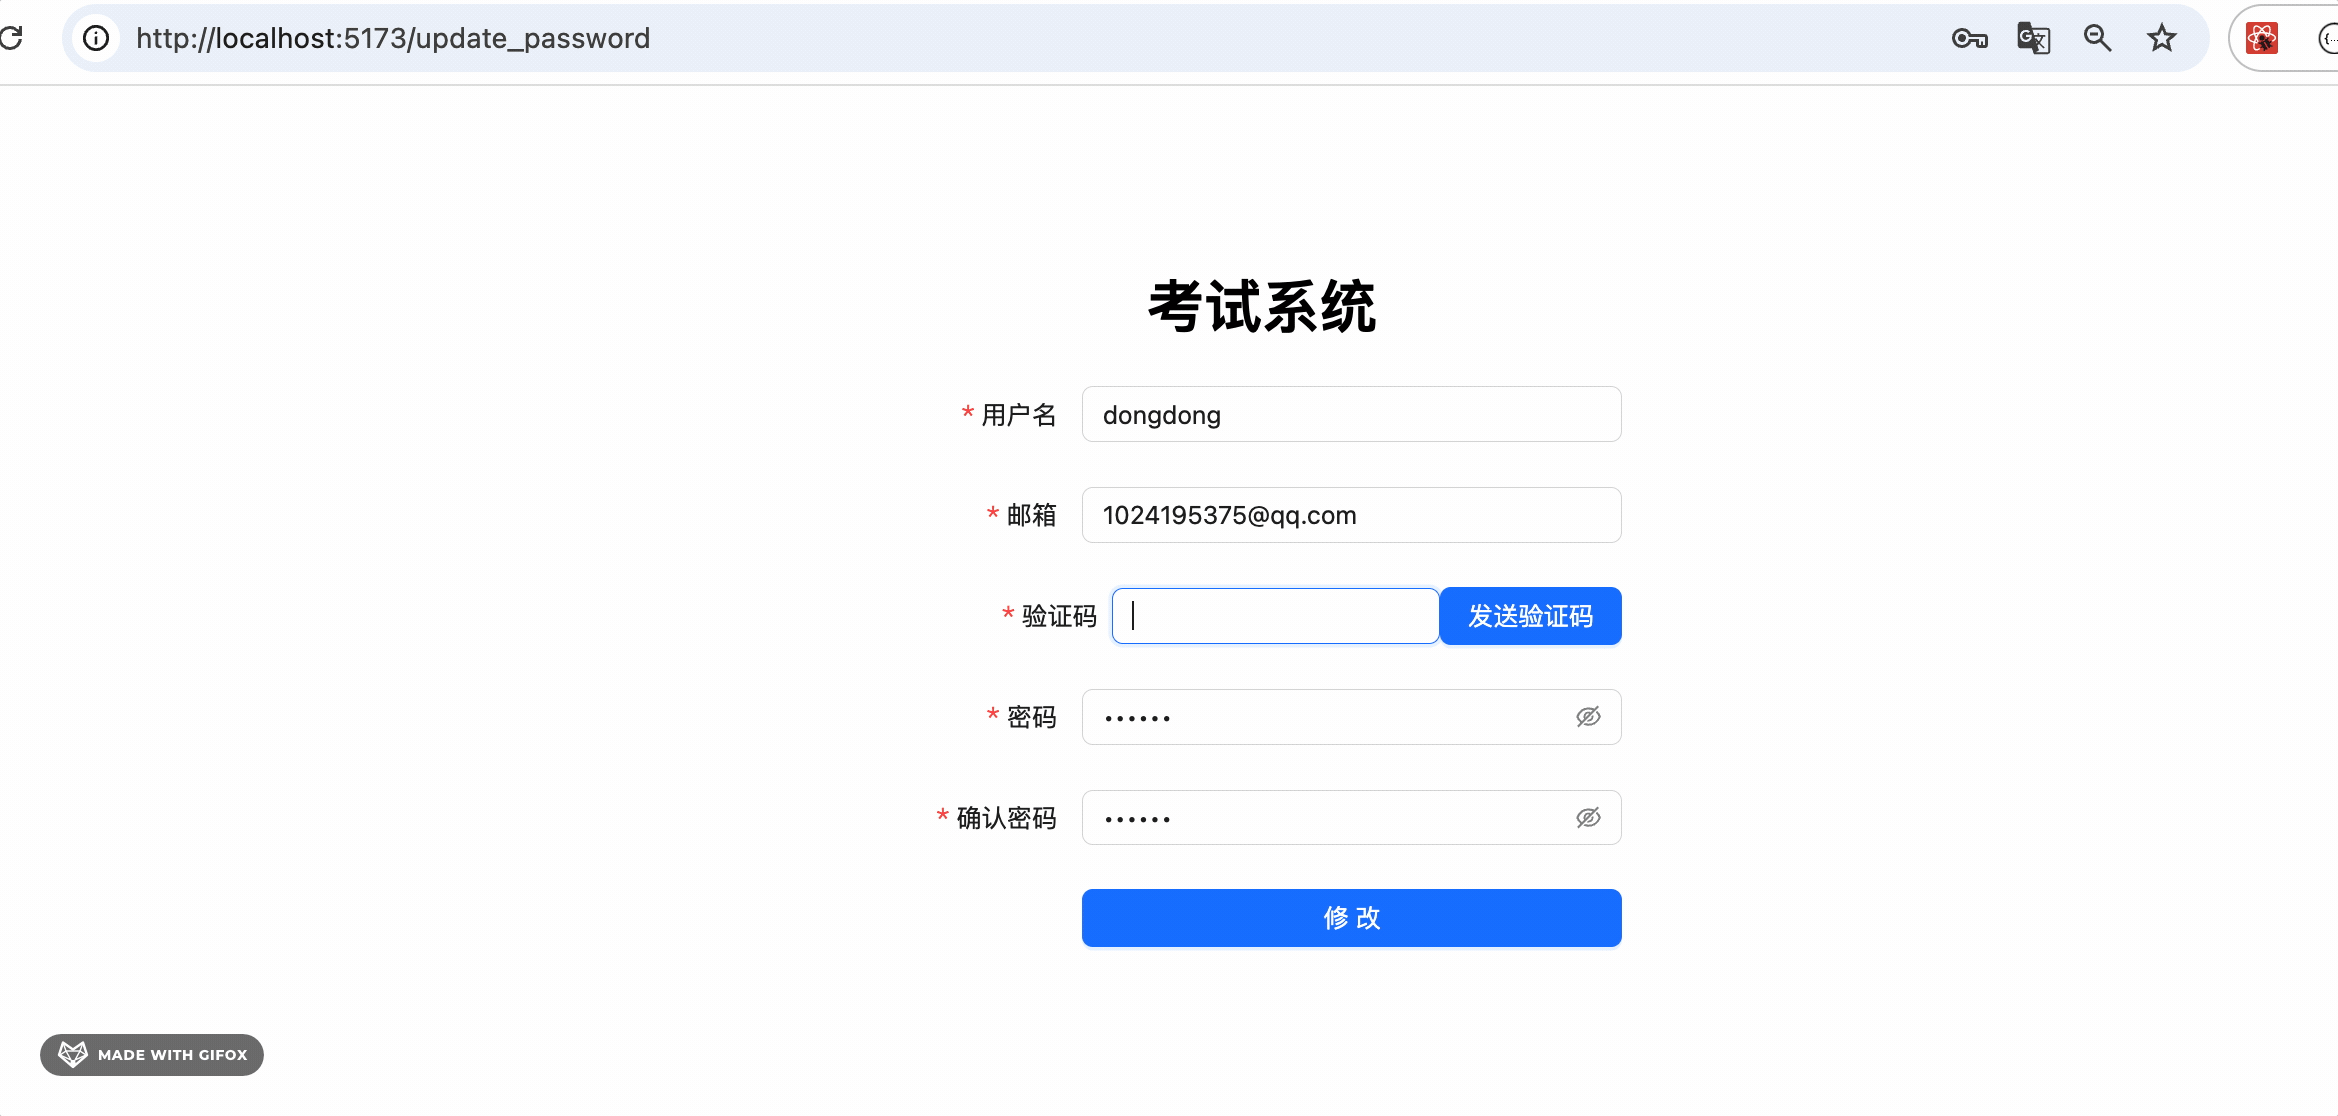
填入邮箱,点击发送验证码。
提示发送成功。
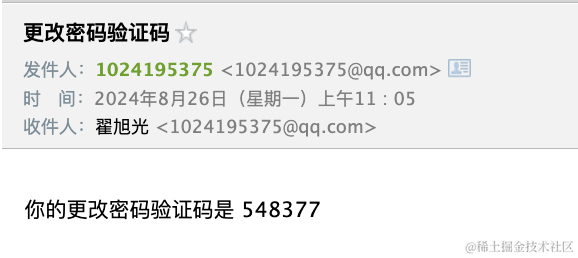
邮箱里也收到了这个验证码。
然后填入新密码,点击修改密码按钮:
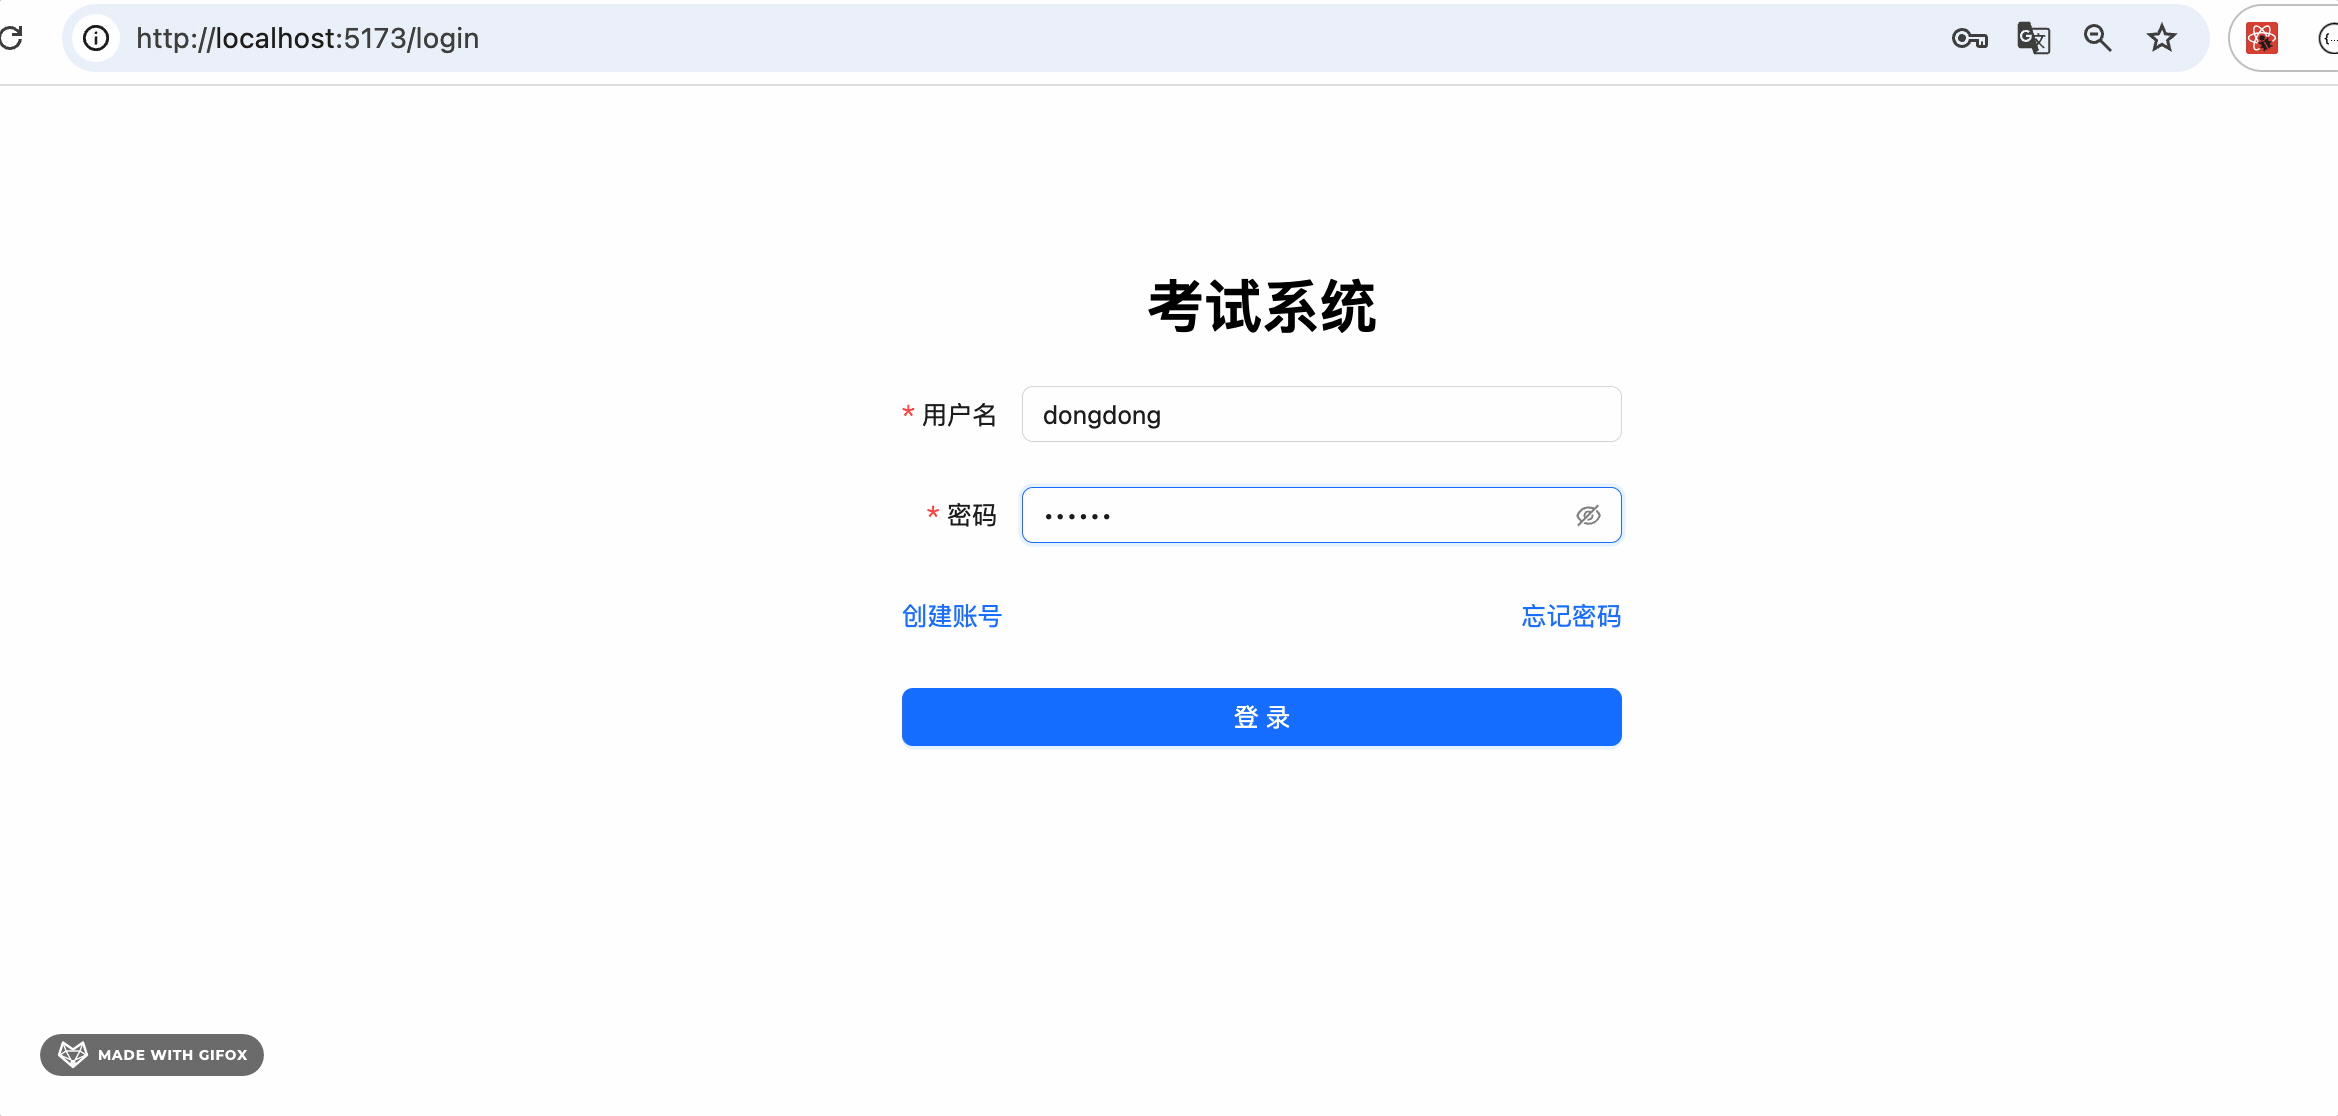
 提示修改成功,然后会跳到登录页面。
在登录页面用新密码登录,提示登录成功。
这样,修改密码功能的前后端就都完成了。
然后来写试卷列表页面。
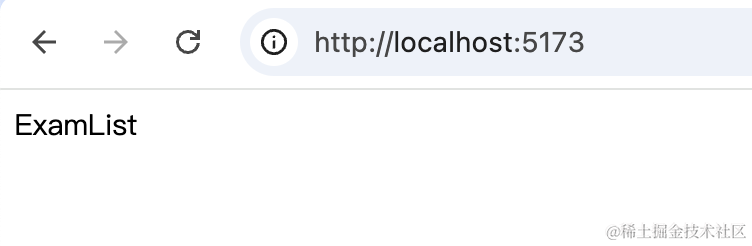
添加一个 ExamList 组件
pages/ExamList/index.tsx
export function ExamList() {
    return <div>ExamList</div>;
}
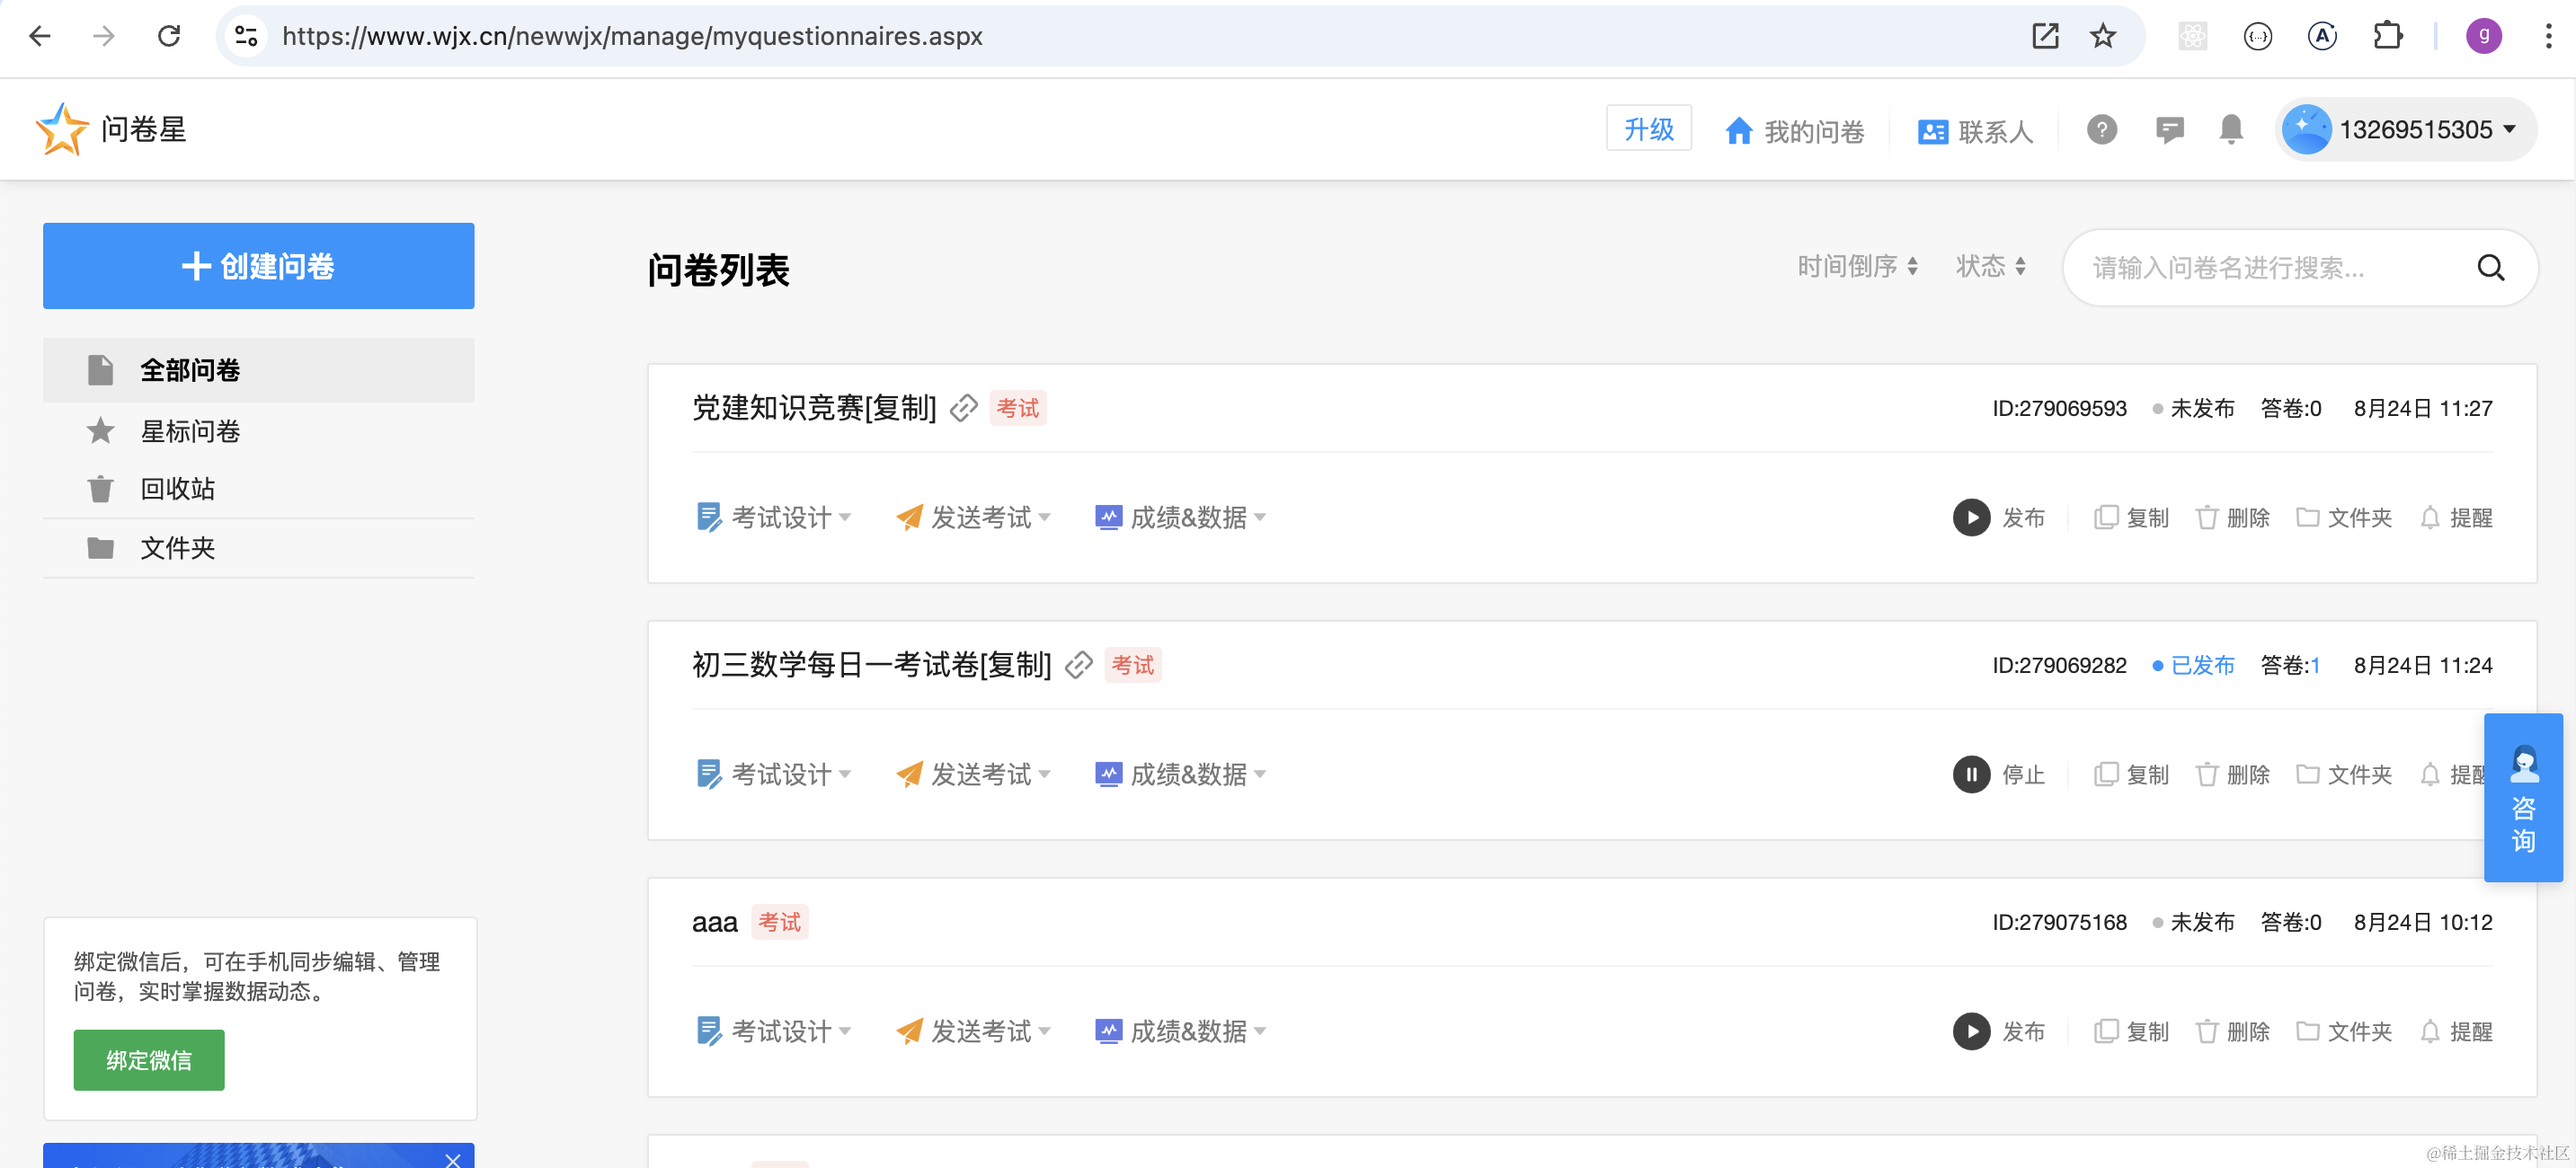
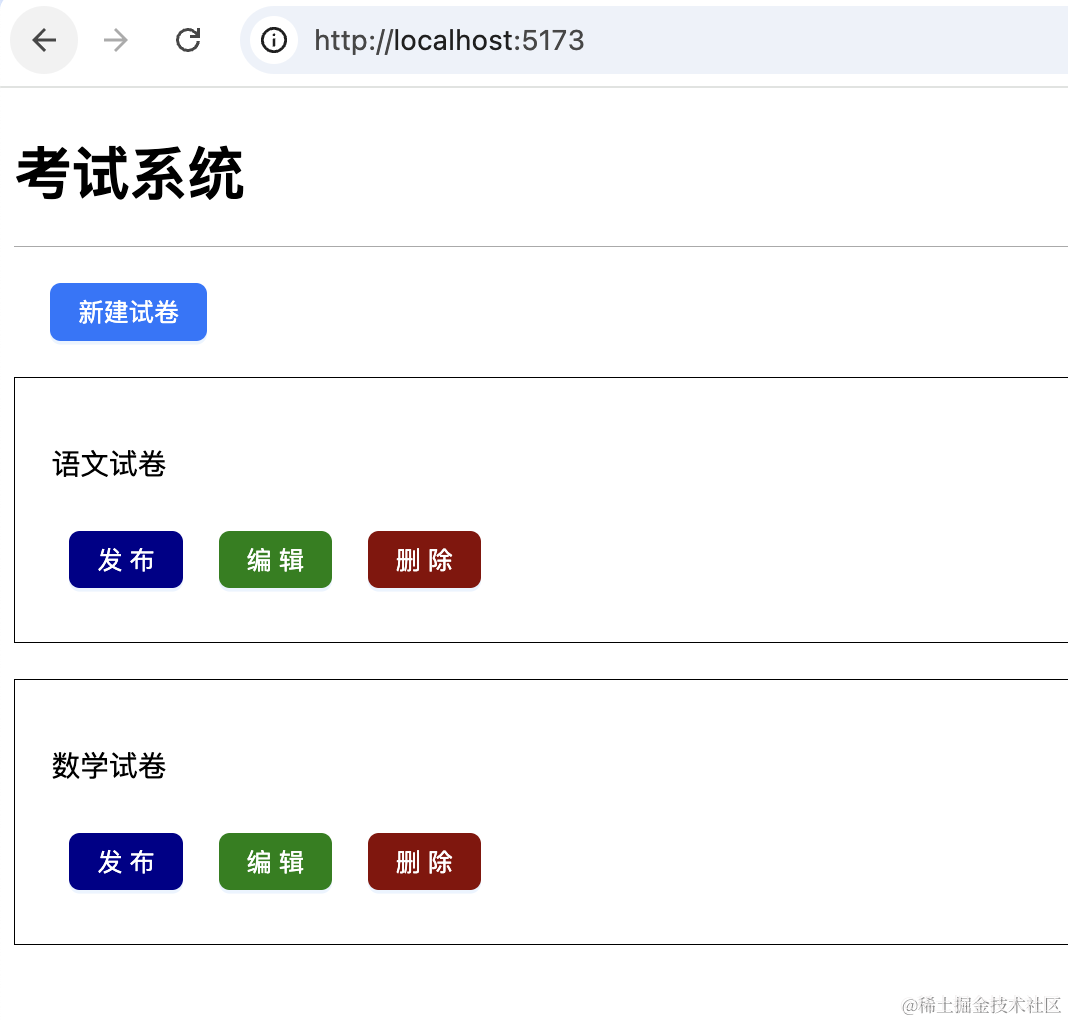
看下问卷星的列表页面:

修改 pages/ExamList/index.tsx
import { Button } from "antd";
import "./index.scss";

export function ExamList() {
    return (
        <div id="ExamList-container">
            <div className="header">
                <h1>考试系统</h1>
            </div>
            <div className="body">
                <div className="operate">
                    <Button type="primary">新建试卷</Button>
                </div>
                <div className="list">
                    <div className="item">
                        <p>语文试卷</p>
                        <div className="btns">
                            <Button
                                className="btn"
                                type="primary"
                                style={{ background: "darkblue" }}>
                                发布
                            </Button>
                            <Button
                                className="btn"
                                type="primary"
                                style={{ background: "green" }}>
                                编辑
                            </Button>
                            <Button
                                className="btn"
                                type="primary"
                                style={{ background: "darkred" }}>
                                删除
                            </Button>
                        </div>
                    </div>
                    <div className="item">
                        <p>数学试卷</p>
                        <div className="btns">
                            <Button
                                className="btn"
                                type="primary"
                                style={{ background: "darkblue" }}>
                                发布
                            </Button>
                            <Button
                                className="btn"
                                type="primary"
                                style={{ background: "green" }}>
                                编辑
                            </Button>
                            <Button
                                className="btn"
                                type="primary"
                                style={{ background: "darkred" }}>
                                删除
                            </Button>
                        </div>
                    </div>
                </div>
            </div>
        </div>
    );
}
写下 index.scss
#ExamList-container {
    .header {
        height: 80px;
        border-bottom: 1px solid #aaa;
        line-height: 80px;
    }
    h1 {
        margin: 0;
    }

    .body {
        .operate {
            padding: 20px;
        }
        .list {
            .item {
                min-height: 100px;
                border: 1px solid #000;
                padding: 20px;
                margin-bottom: 20px;

                .btns {
                    .btn {
                        margin: 10px;
                    }
                }
            }
        }
    }
}
安装用到的 sass 包:
npm install --save-dev sass
看下效果:
然后在 interfaces/index.tsx 调用 /exam/list 接口:
const examServiceInstance = axios.create({
    baseURL: "http://localhost:3002/",
    timeout: 3000,
});

export async function examList() {
    return await examServiceInstance.get("/exam/list");
}
但是这个接口需要登录,拿到 token 里的 userId,用来查询考试列表。
携带 header 的通用逻辑可以放在 axios 的 interceptor 里做。
并且接口返回 token 的 header 更新本地 token 的逻辑。
const examServiceInstance = axios.create({
    baseURL: "http://localhost:3002/",
    timeout: 3000,
});

const requestInterceptor = function (config: InternalAxiosRequestConfig) {
    const accessToken = localStorage.getItem("token");

    if (accessToken) {
        config.headers.authorization = "Bearer " + accessToken;
    }
    return config;
};

examServiceInstance.interceptors.request.use(requestInterceptor);

const responseIntercepor = (response: AxiosResponse) => {
    const newToken = response.headers["token"];
    if (newToken) {
        localStorage.setItem("token", newToken);
    }
    return response;
};

const responseErrorIntercepor = async (error: any) => {
    if (!error.response) {
        return Promise.reject(error);
    }
    let { data } = error.response;
    if (data.statusCode === 401) {
        message.error(data.message);

        setTimeout(() => {
            window.location.href = "/login";
        }, 1500);
    } else {
        return Promise.reject(error);
    }
};

examServiceInstance.interceptors.response.use(
    responseIntercepor,
    responseErrorIntercepor
);
这段逻辑就是在每次发请求之前,在 header 里加上 authorization,带上 token。
当响应的 header 带有 token,就更新本地 token。
如果返回的是 401 的状态码,就提示错误,跳转登录页。
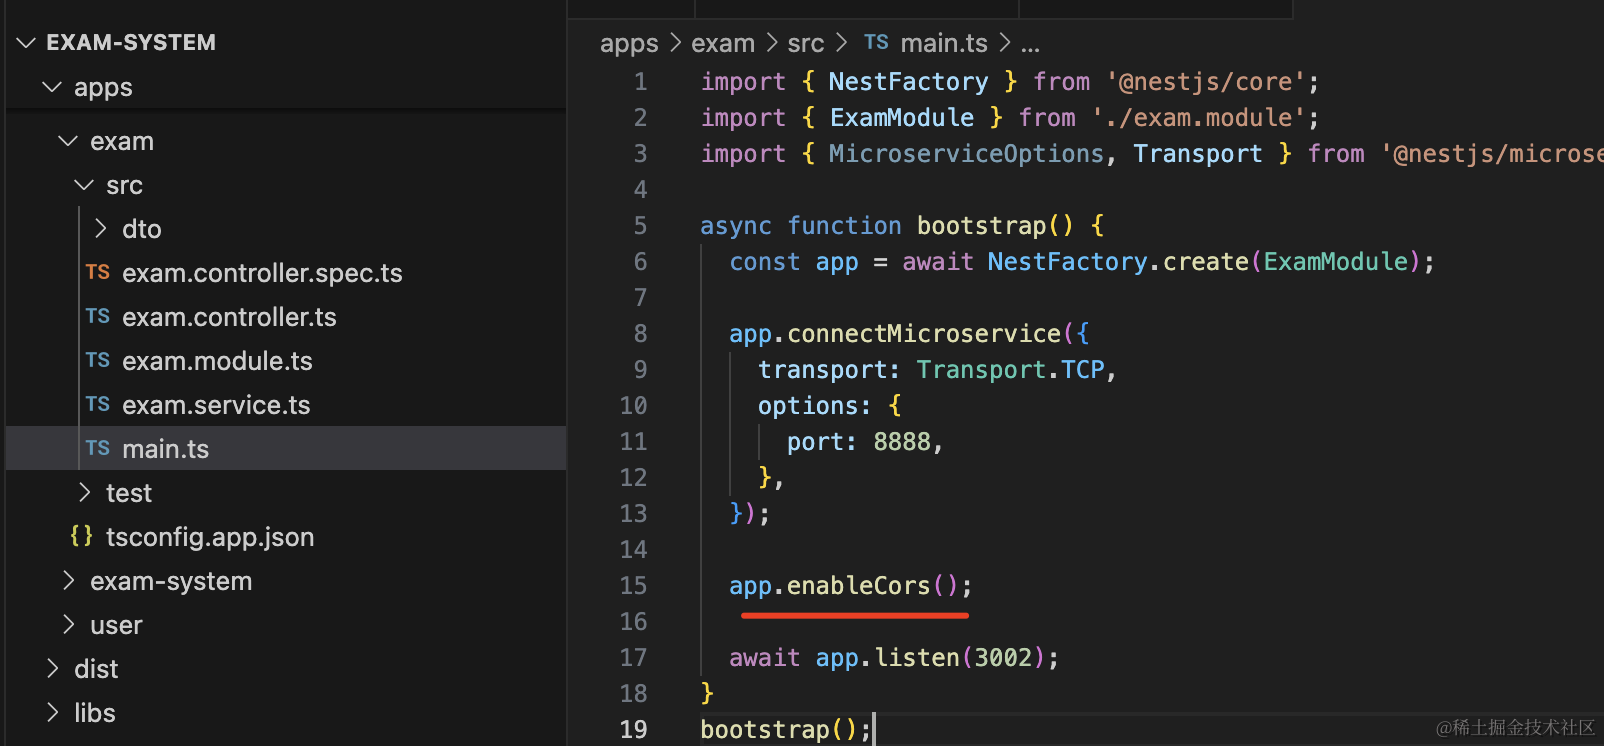
在后端 exam 微服务开启跨域:
然后在 ExamList 页面调用下:

import { Button, message } from "antd";
import "./index.scss";
import { useEffect, useState } from "react";
import { examList } from "../../interfaces";

interface Exam {
    id: number;
    name: string;
    isPublish: boolean;
    isDelete: boolean;
    content: string;
}

export function ExamList() {
    const [list, setList] = useState<Array<Exam>>();

    async function query() {
        try {
            const res = await examList();
            if (res.status === 201 || res.status === 200) {
                setList(res.data);
            }
        } catch (e: any) {
            message.error(e.response?.data?.message || "系统繁忙,请稍后再试");
        }
    }

    useEffect(() => {
        query();
    }, []);

    return (
        <div id="ExamList-container">
            <div className="header">
                <h1>考试系统</h1>
            </div>
            <div className="body">
                <div className="operate">
                    <Button type="primary">新建试卷</Button>
                </div>
                <div className="list">
                    {list?.map((item) => {
                        return (
                            <div className="item">
                                <p>{item.name}</p>
                                <div className="btns">
                                    <Button
                                        className="btn"
                                        type="primary"
                                        style={{ background: "darkblue" }}>
                                        {item.isPublish ? "停止" : "发布"}
                                    </Button>
                                    <Button
                                        className="btn"
                                        type="primary"
                                        style={{ background: "green" }}>
                                        编辑
                                    </Button>
                                    <Button
                                        className="btn"
                                        type="primary"
                                        style={{ background: "darkred" }}>
                                        删除
                                    </Button>
                                </div>
                            </div>
                        );
                    })}
                </div>
            </div>
        </div>
    );
}
测试下:
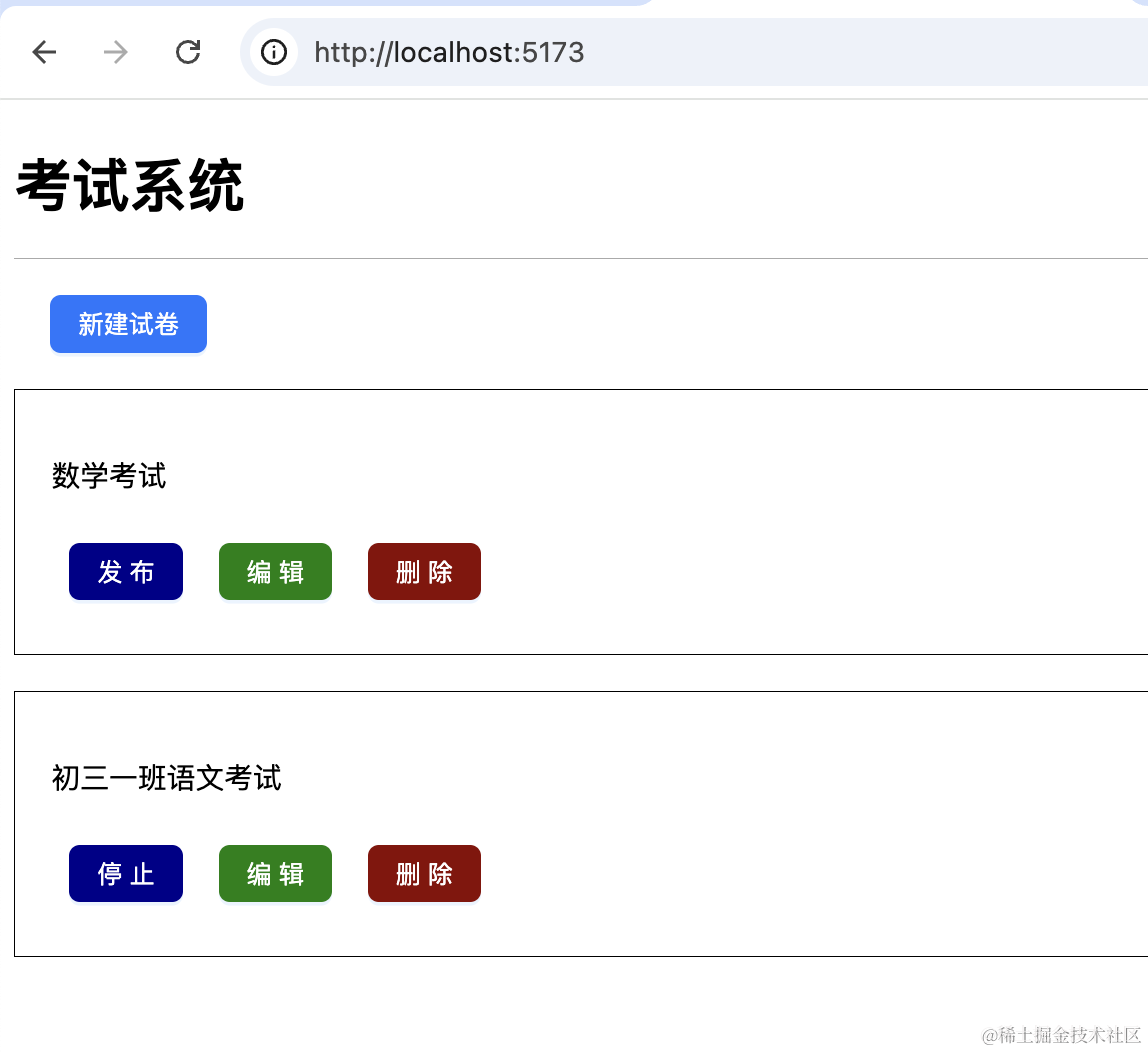
这样,试卷列表就展示出来了。
案例代码在小册仓库:
总结
这节我们实现了修改密码、试卷列表这两个页面。
添加了 axios 的拦截器来实现 token 自动携带和刷新 token,并且在接口返回 401 的时候跳转登录页。
下节我们继续来做试卷相关功能。