序列化 Entity,你不需要 VO 对象
后端系统常见的对象有三种:
Entity:数据实体,和数据库表对应。
DTO: Data Transfer Object,用于封装请求参数。
VO:Value Object,用于封装返回的响应数据。
三者的关系如下:
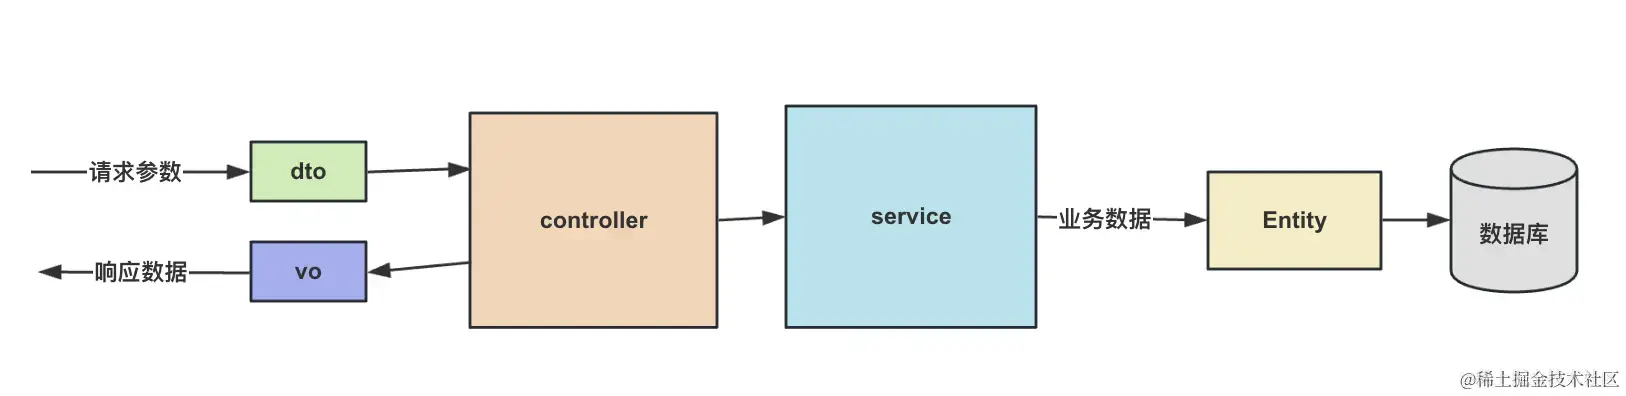
但文档中并没有提到 VO 对象,这是为什么呢?
因为有替代方案。
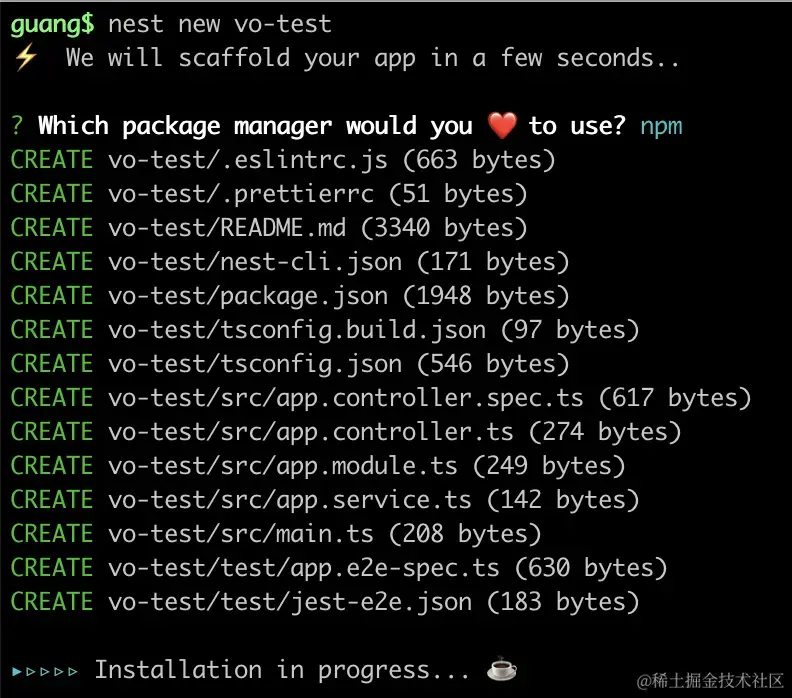
我们来看一下:
nest new vo-test
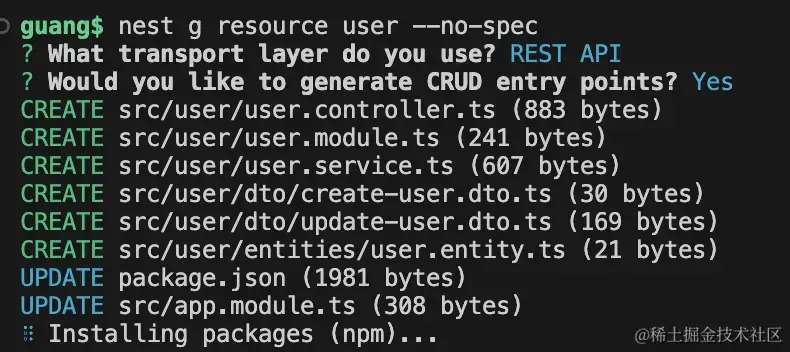
生成一个 user 的 CRUD 模块:
nest g resource user --no-spec
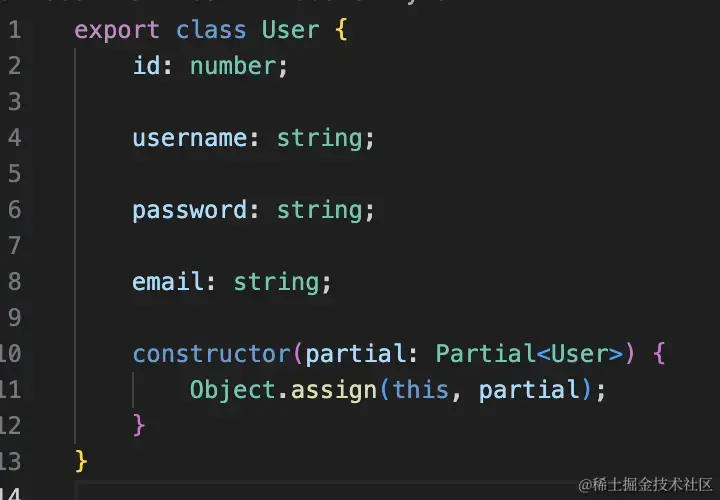
在 entity 里加一些内容:
export class User {
    id: number;

    username: string;

    password: string;

    email: string;

    constructor(partial: Partial<User>) {
        Object.assign(this, partial);
    }
}
Partial 是把 User 的属性变为可选:
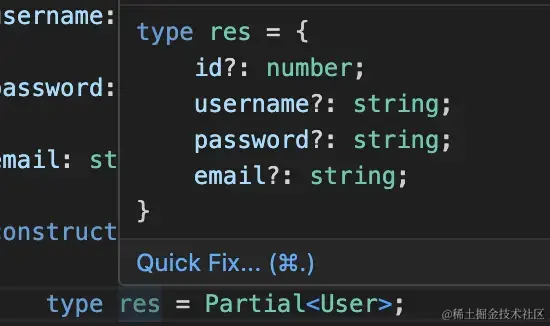
可以传入部分属性,然后 Object.assign 赋值到 this。
然后 CreateUserDto 里包含这些属性:
export class CreateUserDto {
    username: string;

    password: string;

    email: string;
}
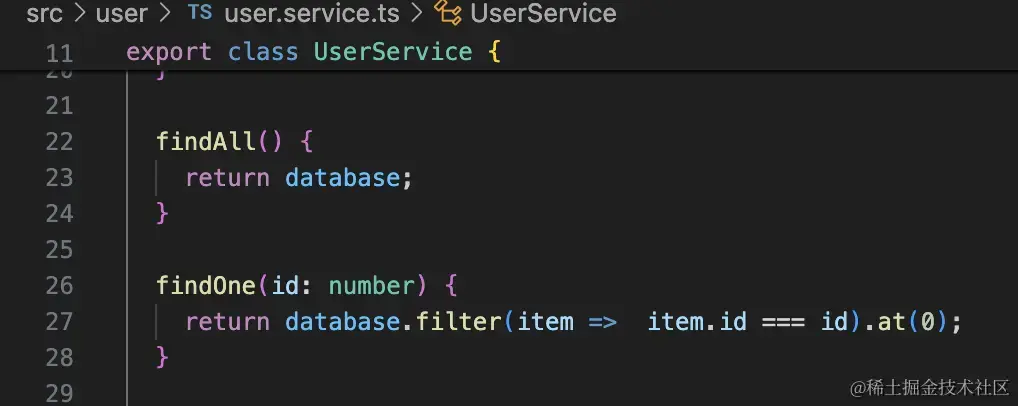
实现下 UserService 的 create 和 find 的逻辑:
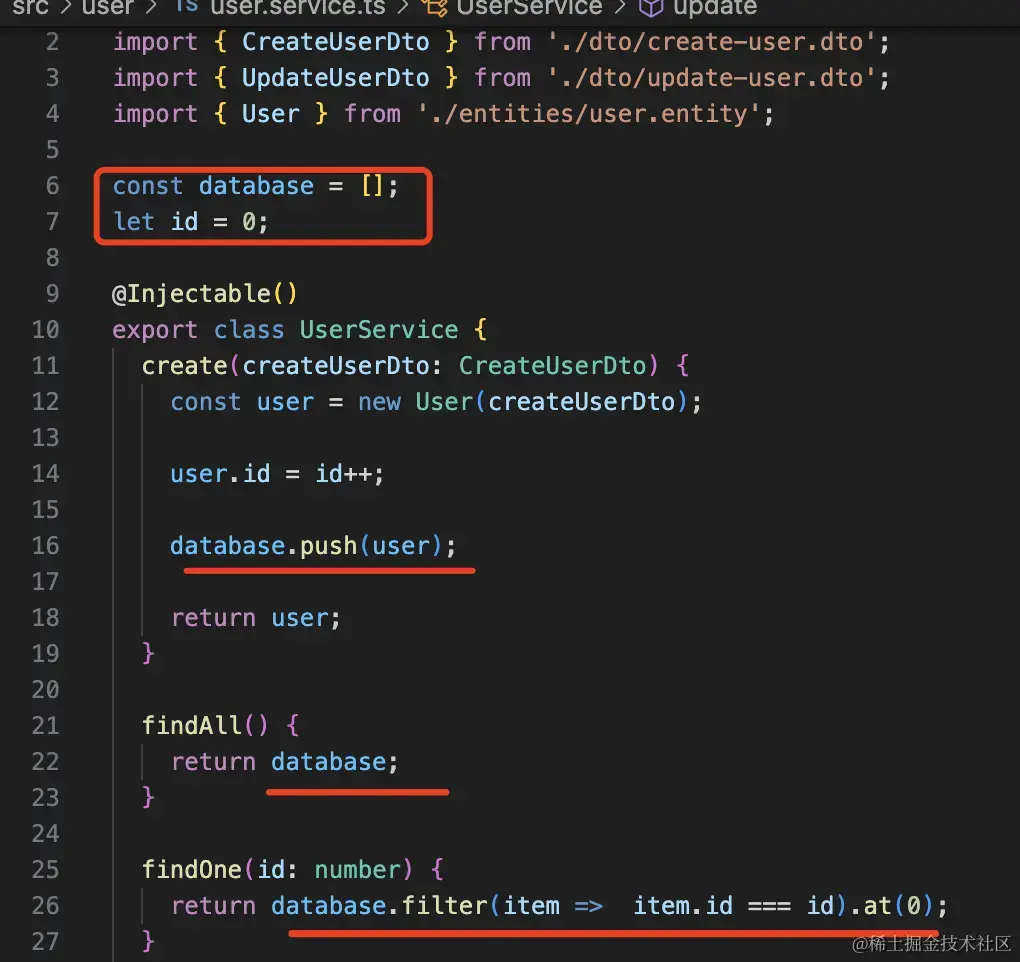
这里我们直接用数组模拟 database 来保存数据。
import { BadRequestException, Injectable } from "@nestjs/common";
import { CreateUserDto } from "./dto/create-user.dto";
import { UpdateUserDto } from "./dto/update-user.dto";
import { User } from "./entities/user.entity";

const database = [];
let id = 0;

@Injectable()
export class UserService {
    create(createUserDto: CreateUserDto) {
        const user = new User(createUserDto);

        user.id = id++;

        database.push(user);

        return user;
    }

    findAll() {
        return database;
    }

    findOne(id: number) {
        return database.filter((item) => item.id === id).at(0);
    }

    update(id: number, updateUserDto: UpdateUserDto) {
        return `This action updates a #${id} user`;
    }

    remove(id: number) {
        return `This action removes a #${id} user`;
    }
}
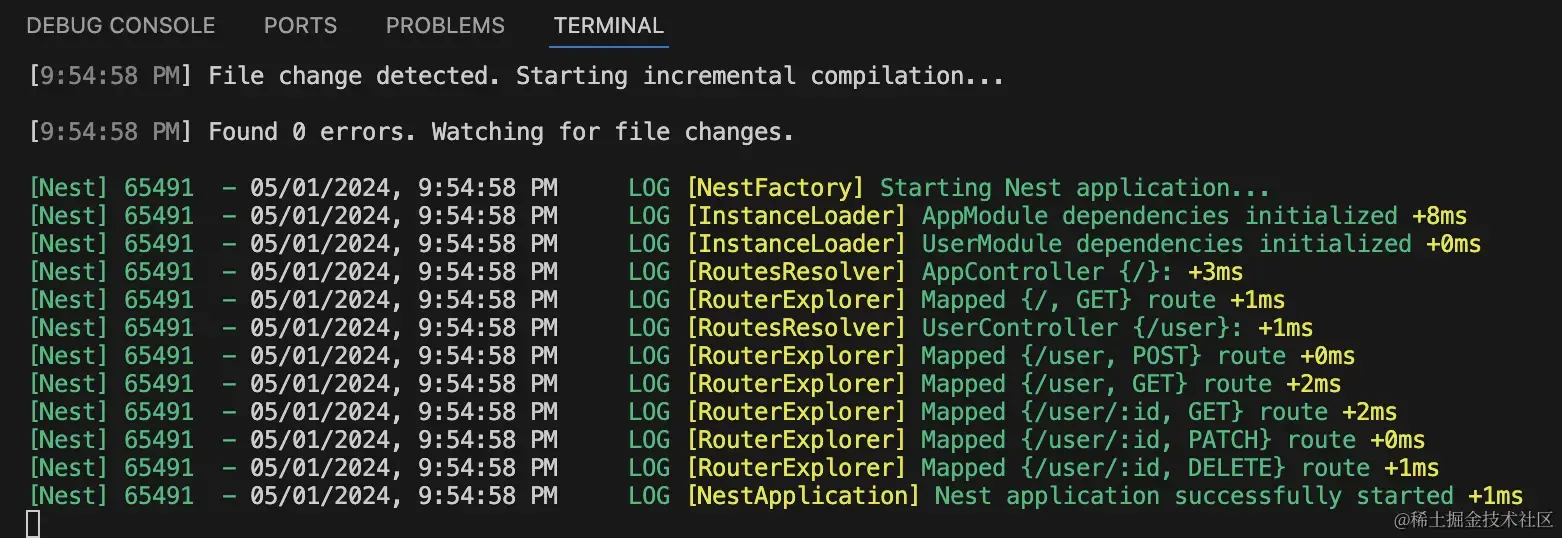
把服务跑起来:
npm run start:dev
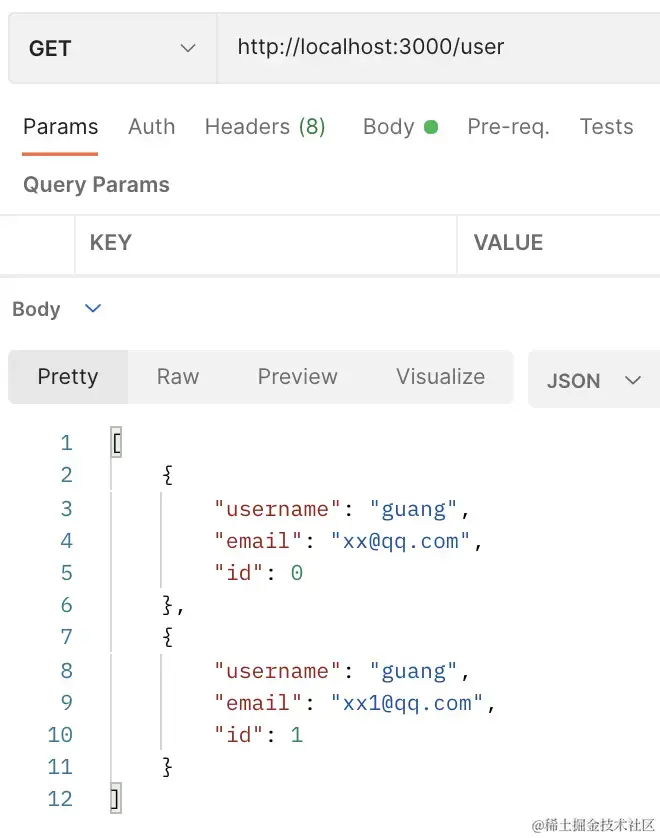
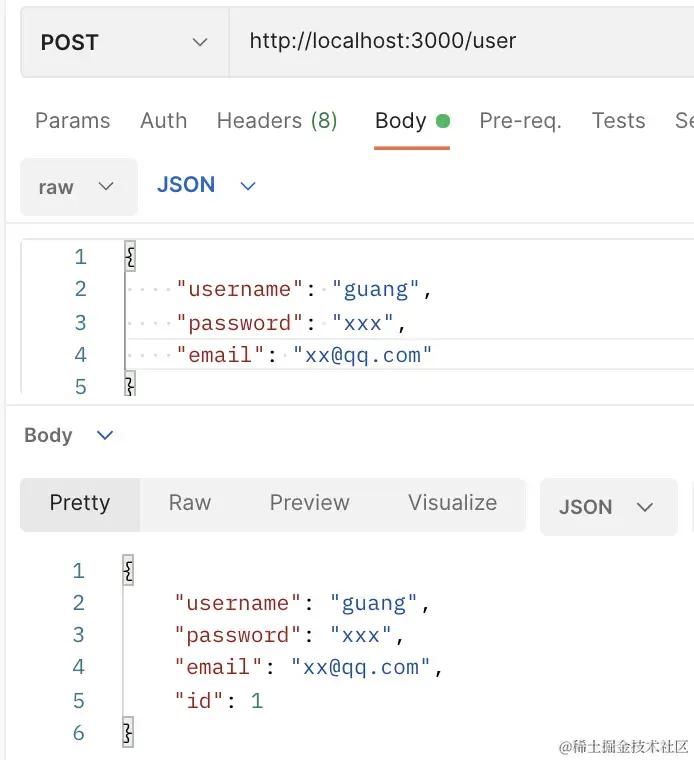
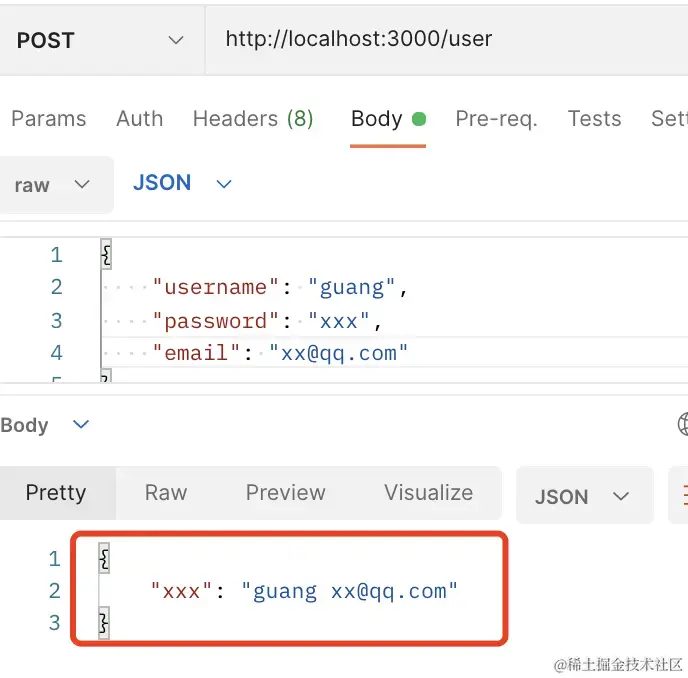
创建两个 user:
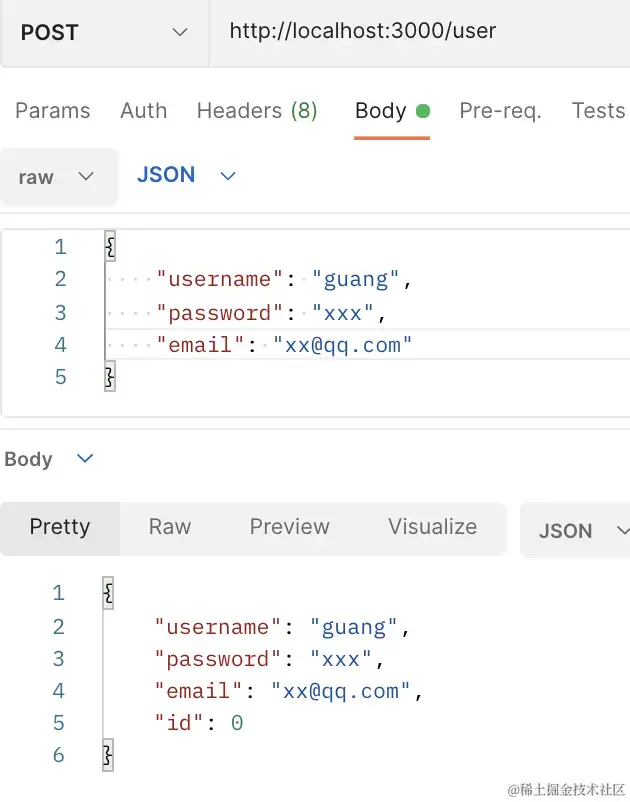
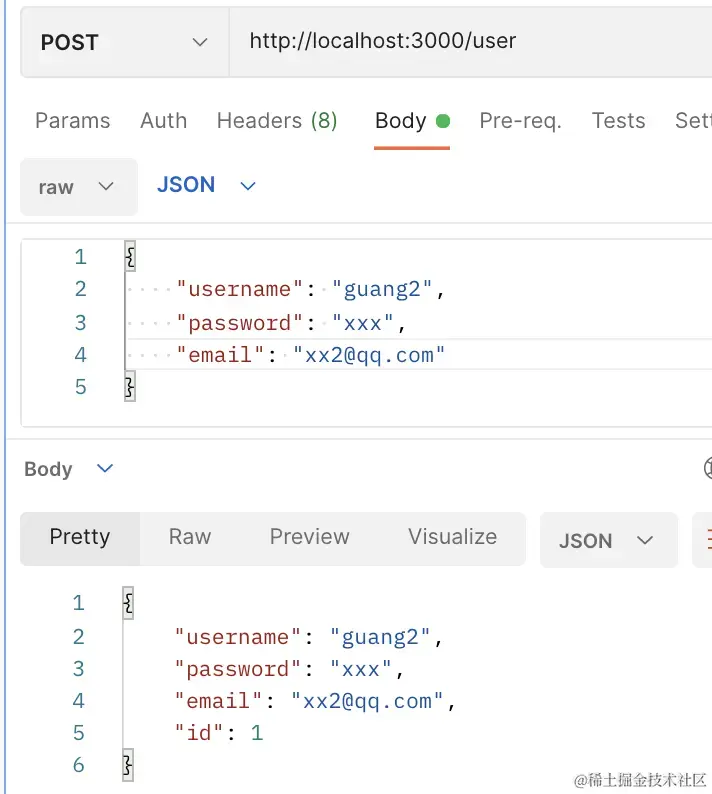
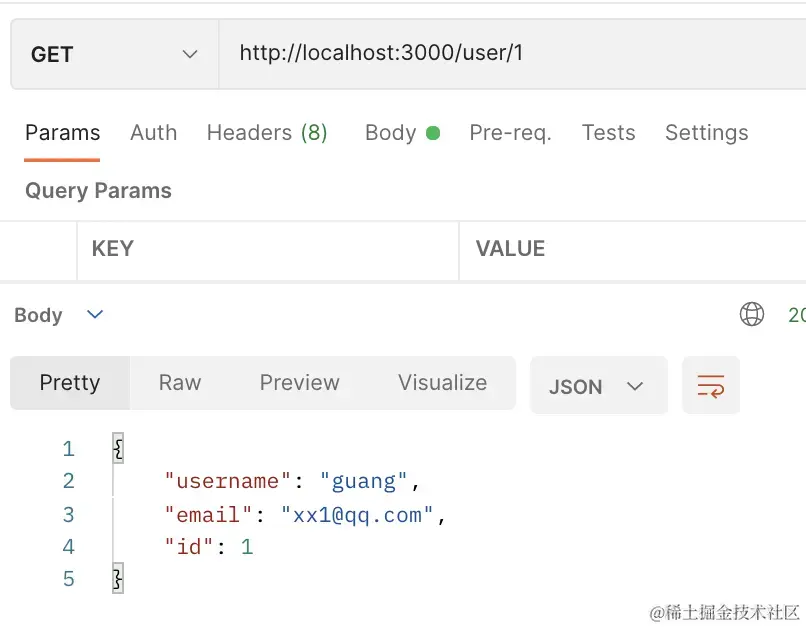
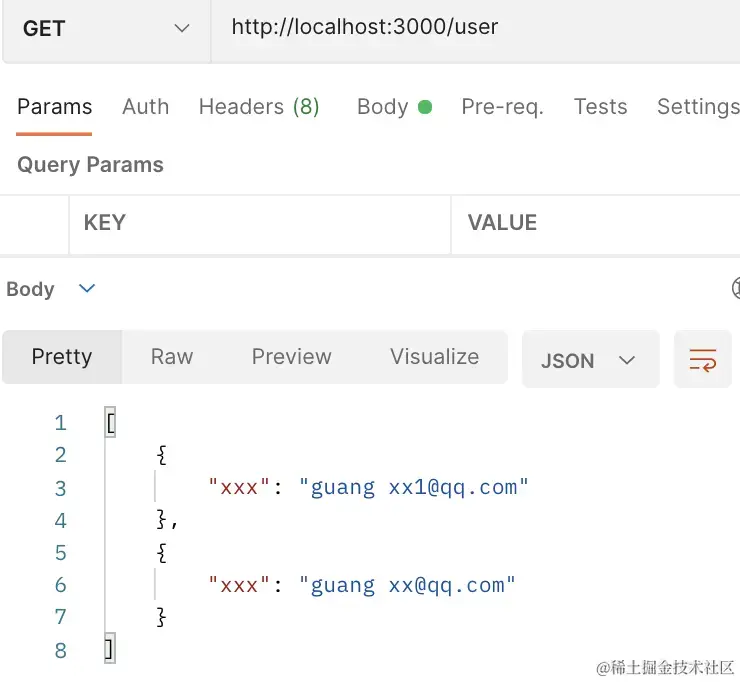
查一下:
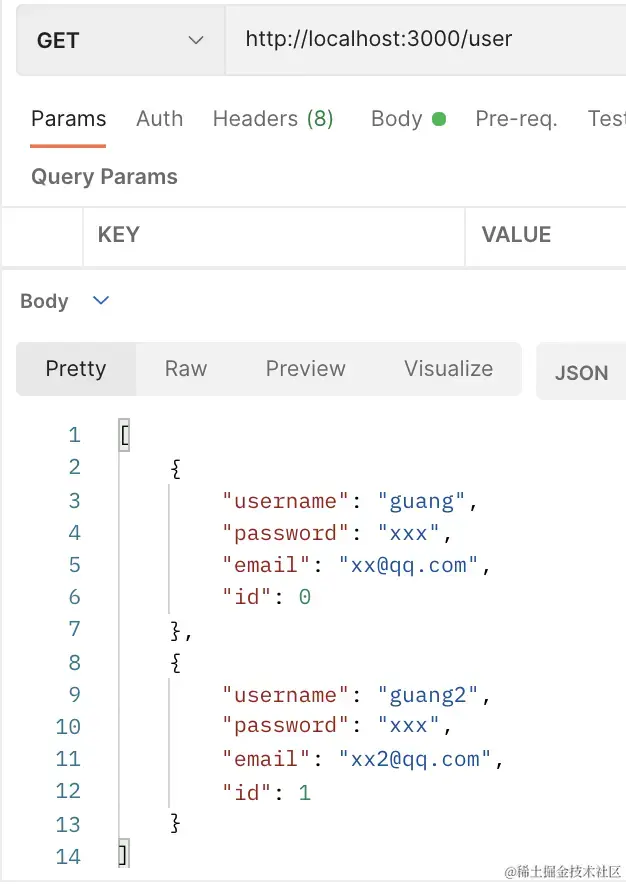
可以看到,user 的 password 也被返回了。
而这个应该过滤掉。
一般这种情况,我们都会封装个 vo。
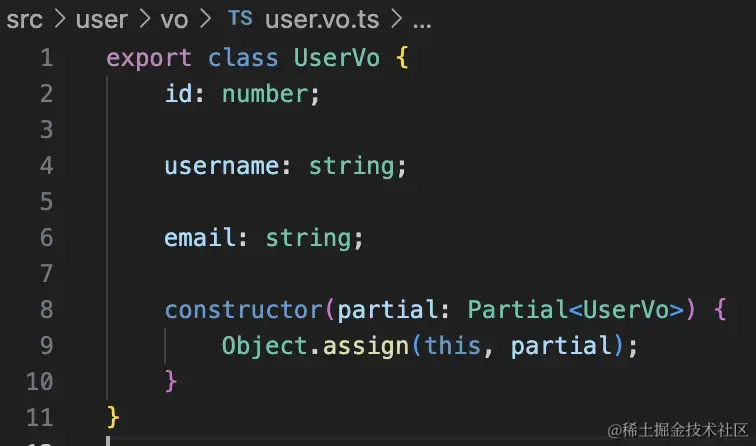
创建 vo/user.vo.ts:
export class UserVo {
    id: number;

    username: string;

    email: string;

    constructor(partial: Partial<UserVo>) {
        Object.assign(this, partial);
    }
}
然后把数据封装成 vo 返回:
findAll() {
    return database.map(item => {
      return new UserVo({
        id: item.id,
        username: item.username,
        email: item.email
      });
    });
}

findOne(id: number) {
    return database.filter(item =>  item.id === id).map(item => {
      return new UserVo({
        id: item.id,
        username: item.username,
        email: item.email
      });
    }).at(0);
}
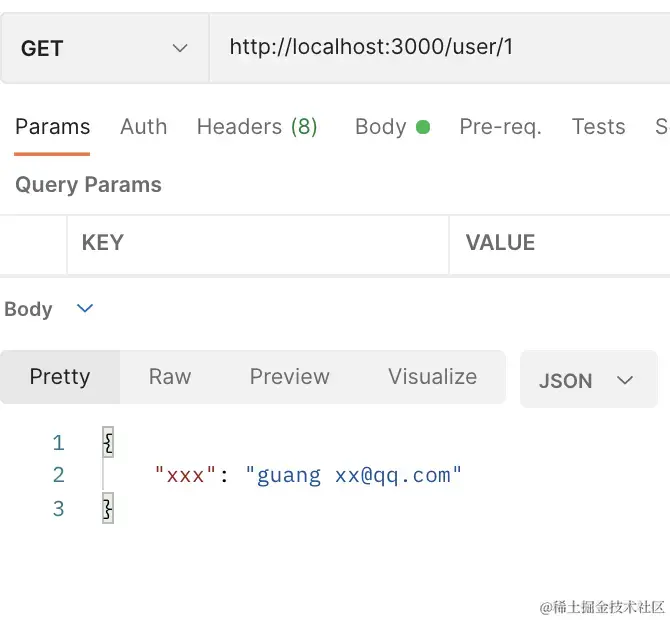
试一下:
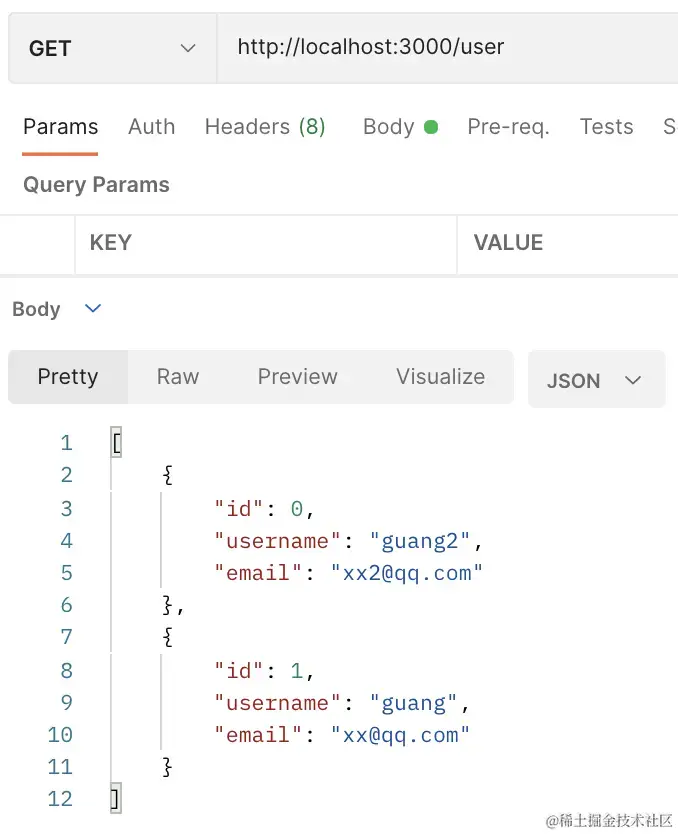
可以看到,这样就没有 password 了。
但你会发现 UserVo 和 User entity 很类似:
对于 dto 我们可以通过 PartialType、PickType、OmitType、IntersectionType 来组合已有 dto,避免重复。
那 vo 是不是也可以呢?
是的,nest 里可以直接复用 entity 作为 vo。
这里要用到 class-transformer 这个包:
npm install --save class-transformer

然后在 UserController 的查询方法上加上 ClassSerializerInterceptor 就好了:
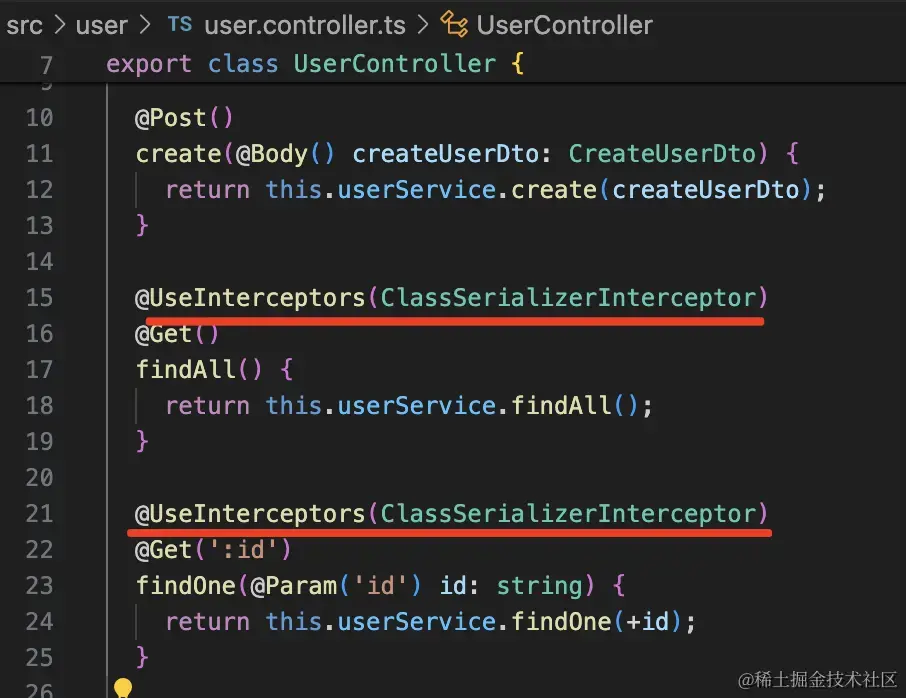
代码恢复原样:
现在返回的数据就没有 password 字段了:
class-transformer 这个包我们用过,是用于根据 class 创建对应的对象的。
当时是 ValidationPipe 里用它来创建 dto class 对应的对象。
这里也是用它来创建 entity class 对应的对象。
简单看下 ClassSerializerInterceptor 的源码:
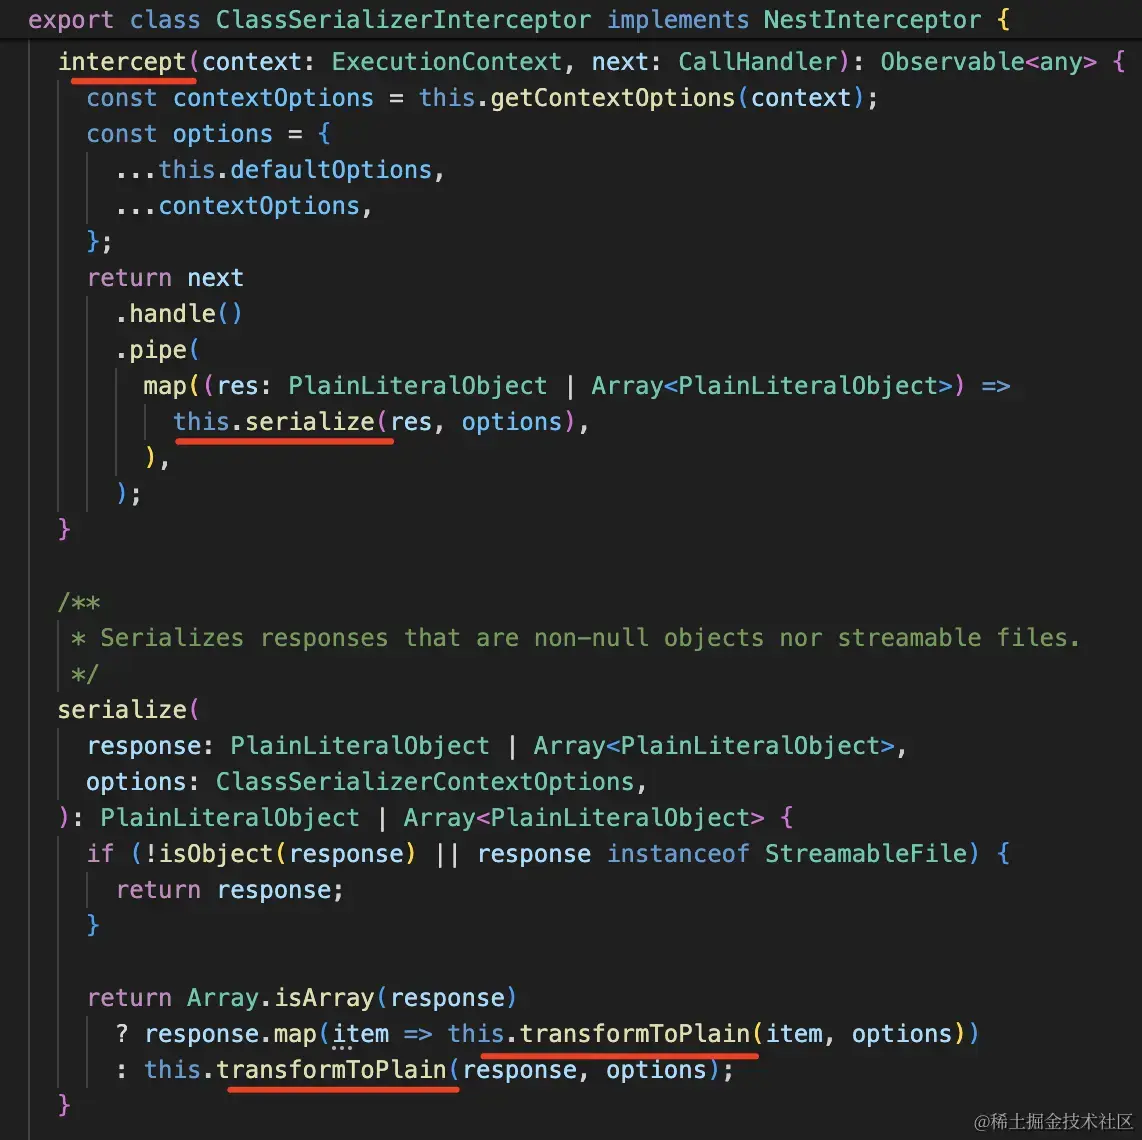
它是通过 map 对响应做转换,在 serialize 方法拿到响应的对象,如果是数组就拿到每个元素。
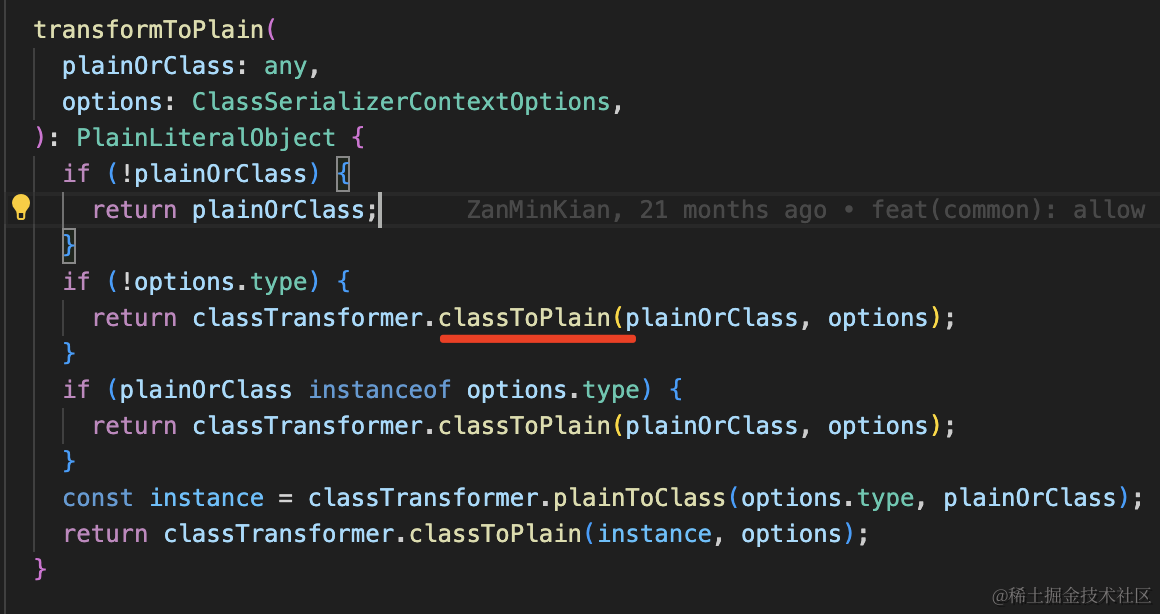
在 transformToPlain 方法里,调用 classToPlain 创建对象。
它会先拿到响应对象的 class、然后根据 class 上的装饰器来创建新的对象。
当然,装饰器不只有 @Exclude,还有几个有用的:
import { Exclude, Expose, Transform } from "class-transformer";

export class User {
    id: number;

    username: string;

    @Exclude()
    password: string;

    @Expose()
    get xxx(): string {
        return `${this.username} ${this.email}`;
    }

    @Transform(({ value }) => "邮箱是:" + value)
    email: string;

    constructor(partial: Partial<User>) {
        Object.assign(this, partial);
    }
}
@Expose 是添加一个导出的字段,这个字段是只读的。
@Transform 是对返回的字段值做一些转换。
测试下:
可以看到,返回的数据多了 xxx 字段,email 字段也做了修改:

这样基于 entity 直接创建 vo 确实方便多了。
此外,你可以可以通过 @SerializeOptions 装饰器加一些序列化参数:
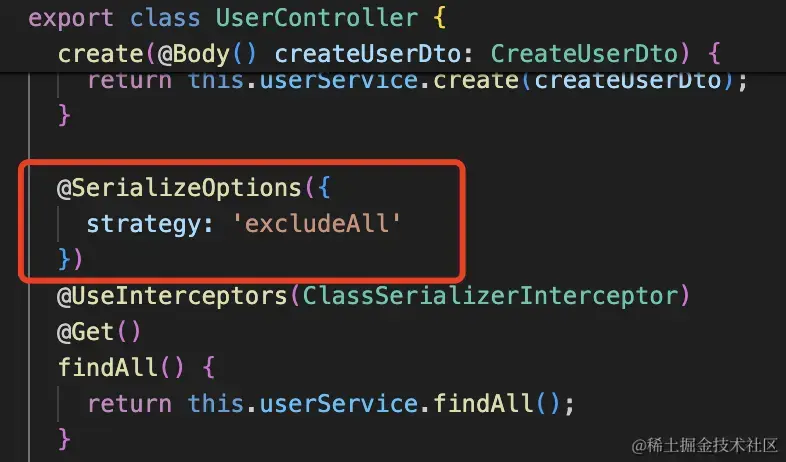
strategy 默认值是 exposeAll,全部导出,除了有 @Exclude 装饰器的。
设置为 excludeAl 就是全部排除,除了有 @Expose 装饰器的。
当然,你可以 ClassSerializerInterceptor 和 SerializeOptions 加到 class 上:

这样,controller 所有的接口返回的对象都会做处理:
swagger 那节当返回对象的时候,我们都是创建了个 vo 的类,在 vo class 上加上 swagger 的装饰器:
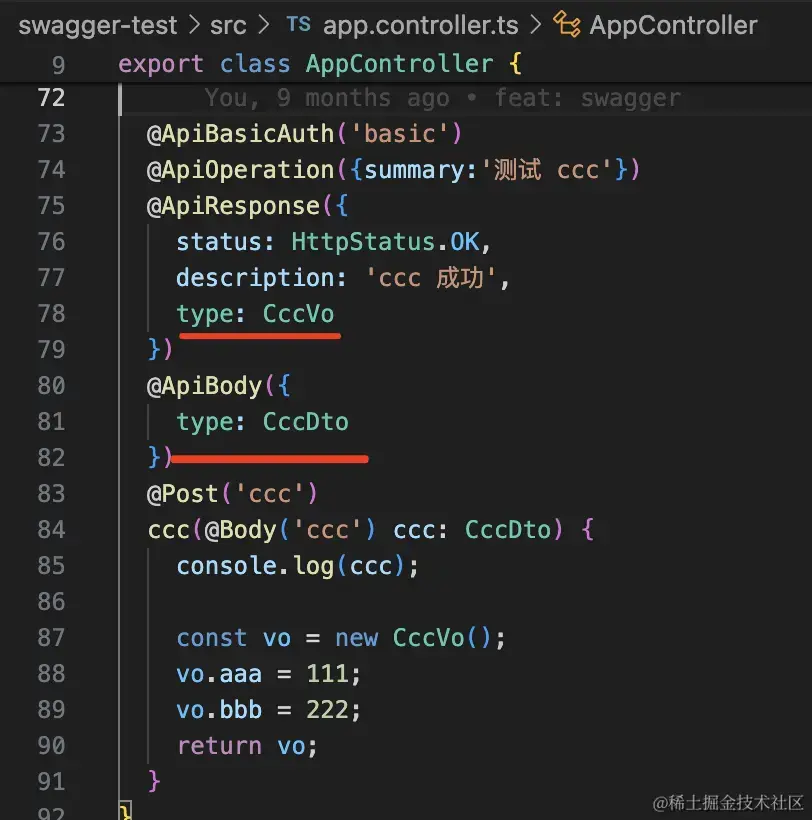
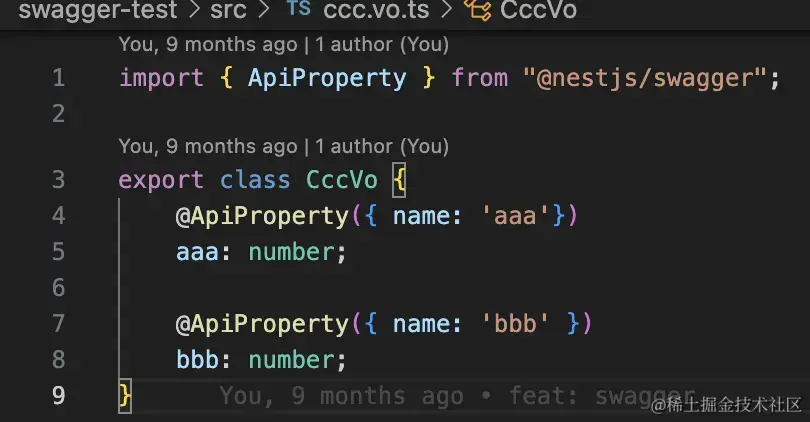
其实没必要,完全可以直接用 entity。
安装 swagger 的包:
npm install --save @nestjs/swagger
然后在 main.ts 添加 swagger 的入口代码:
import { NestFactory } from "@nestjs/core";
import { AppModule } from "./app.module";
import { DocumentBuilder, SwaggerModule } from "@nestjs/swagger";

async function bootstrap() {
    const app = await NestFactory.create(AppModule);

    const config = new DocumentBuilder()
        .setTitle("Test example")
        .setDescription("The API description")
        .setVersion("1.0")
        .addTag("test")
        .build();
    const document = SwaggerModule.createDocument(app, config);
    SwaggerModule.setup("doc", app, document);

    await app.listen(3000);
}
bootstrap();
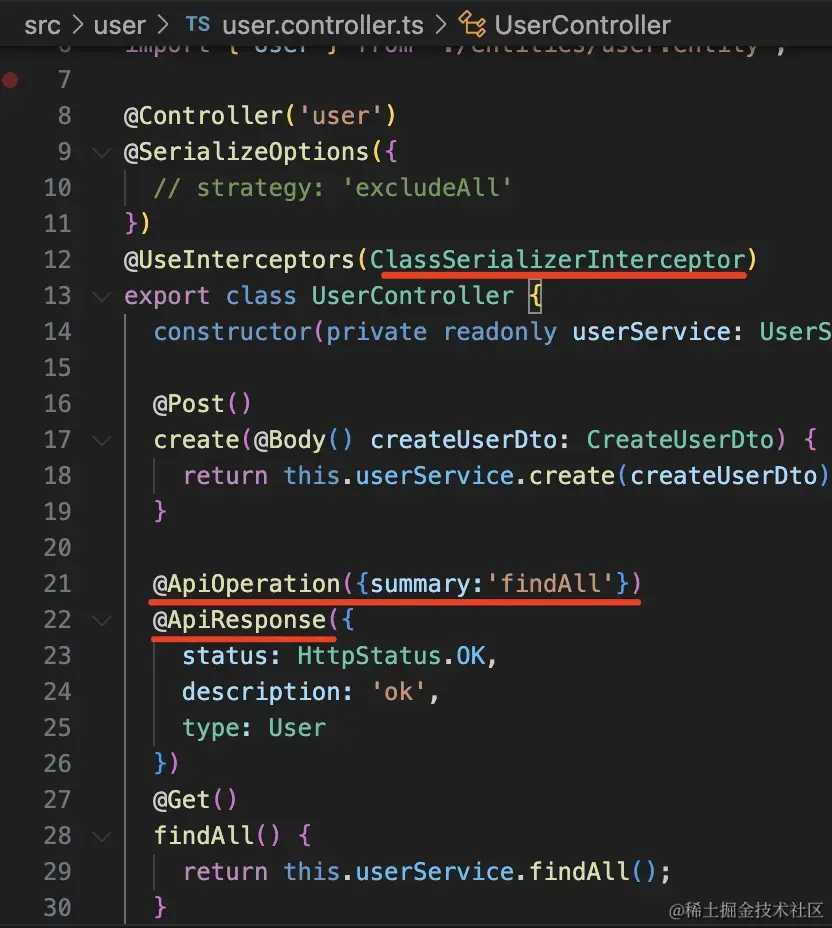
现在 @apiResponse 里就可以直接指定 User 的 entity 了:
import {
    Controller,
    Get,
    Post,
    Body,
    Patch,
    Param,
    Delete,
    UseInterceptors,
    ClassSerializerInterceptor,
    SerializeOptions,
    HttpStatus,
} from "@nestjs/common";
import { UserService } from "./user.service";
import { CreateUserDto } from "./dto/create-user.dto";
import { UpdateUserDto } from "./dto/update-user.dto";
import { ApiBody, ApiOperation, ApiResponse } from "@nestjs/swagger";
import { User } from "./entities/user.entity";

@Controller("user")
@SerializeOptions({
    // strategy: 'excludeAll'
})
@UseInterceptors(ClassSerializerInterceptor)
export class UserController {
    constructor(private readonly userService: UserService) {}

    @Post()
    create(@Body() createUserDto: CreateUserDto) {
        return this.userService.create(createUserDto);
    }

    @ApiOperation({ summary: "findAll" })
    @ApiResponse({
        status: HttpStatus.OK,
        description: "ok",
        type: User,
    })
    @Get()
    findAll() {
        return this.userService.findAll();
    }

    @Get(":id")
    findOne(@Param("id") id: string) {
        return this.userService.findOne(+id);
    }

    @Patch(":id")
    update(@Param("id") id: string, @Body() updateUserDto: UpdateUserDto) {
        return this.userService.update(+id, updateUserDto);
    }

    @Delete(":id")
    remove(@Param("id") id: string) {
        return this.userService.remove(+id);
    }
}
在 User 里加一下 swagger 的装饰器:
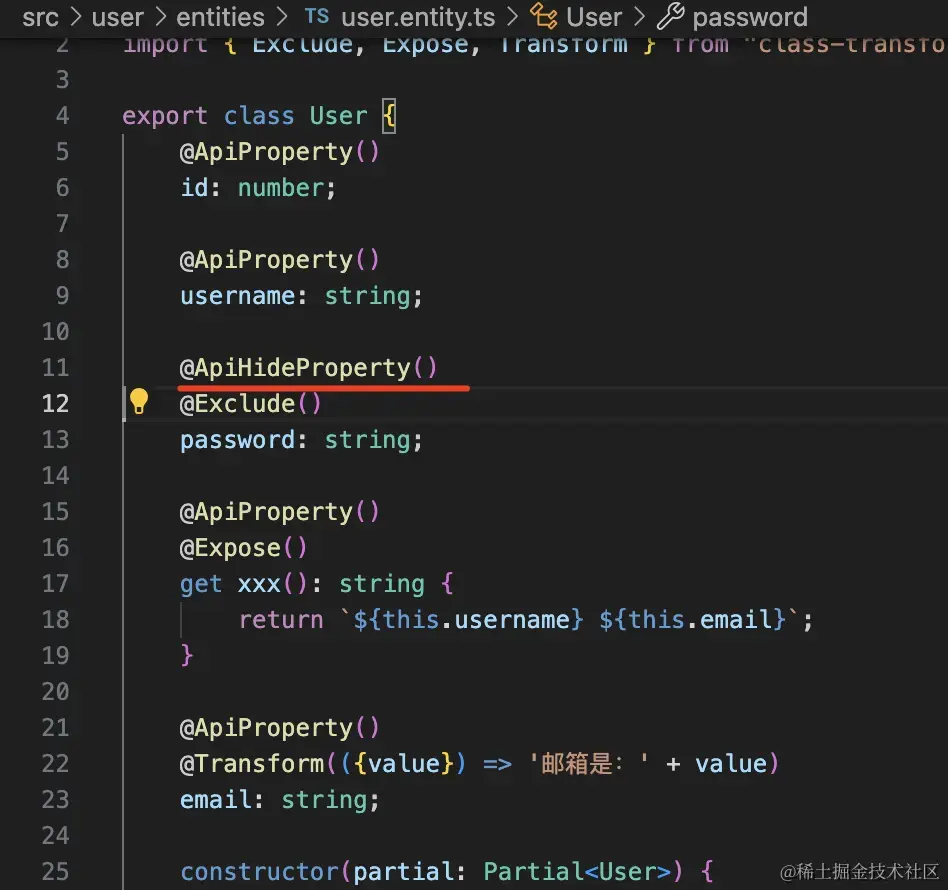
import { ApiHideProperty, ApiProperty } from "@nestjs/swagger";
import { Exclude, Expose, Transform } from "class-transformer";

export class User {
    @ApiProperty()
    id: number;

    @ApiProperty()
    username: string;

    @ApiHideProperty()
    @Exclude()
    password: string;

    @ApiProperty()
    @Expose()
    get xxx(): string {
        return `${this.username} ${this.email}`;
    }

    @ApiProperty()
    @Transform(({ value }) => "邮箱是:" + value)
    email: string;

    constructor(partial: Partial<User>) {
        Object.assign(this, partial);
    }
}
注意,这里要用 @ApiHideProperty 把 password 字段隐藏掉。
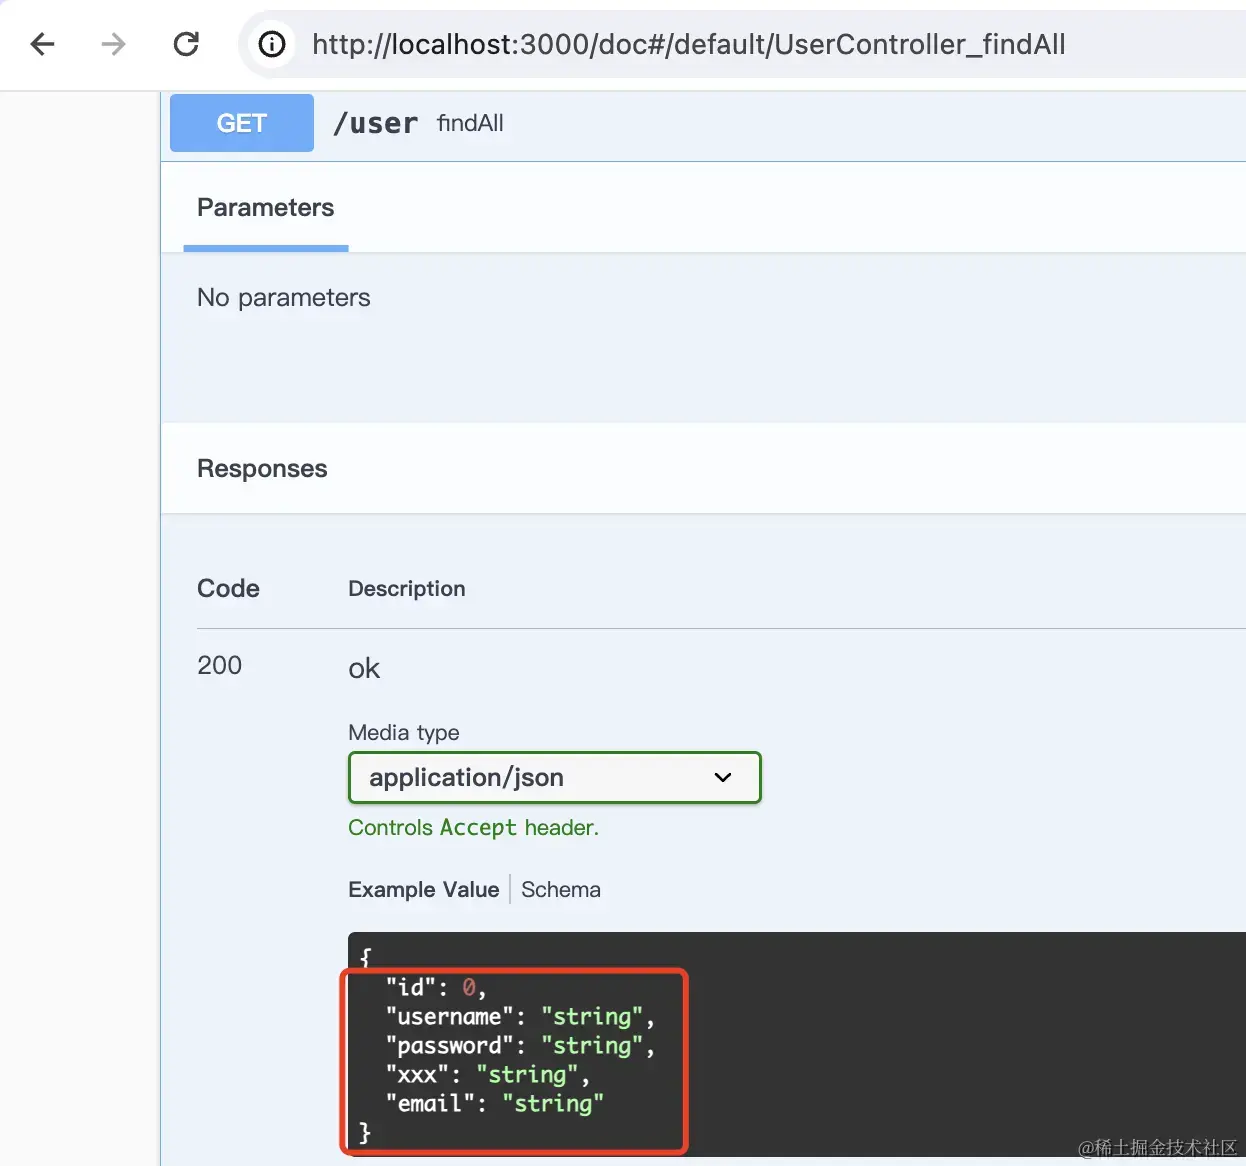
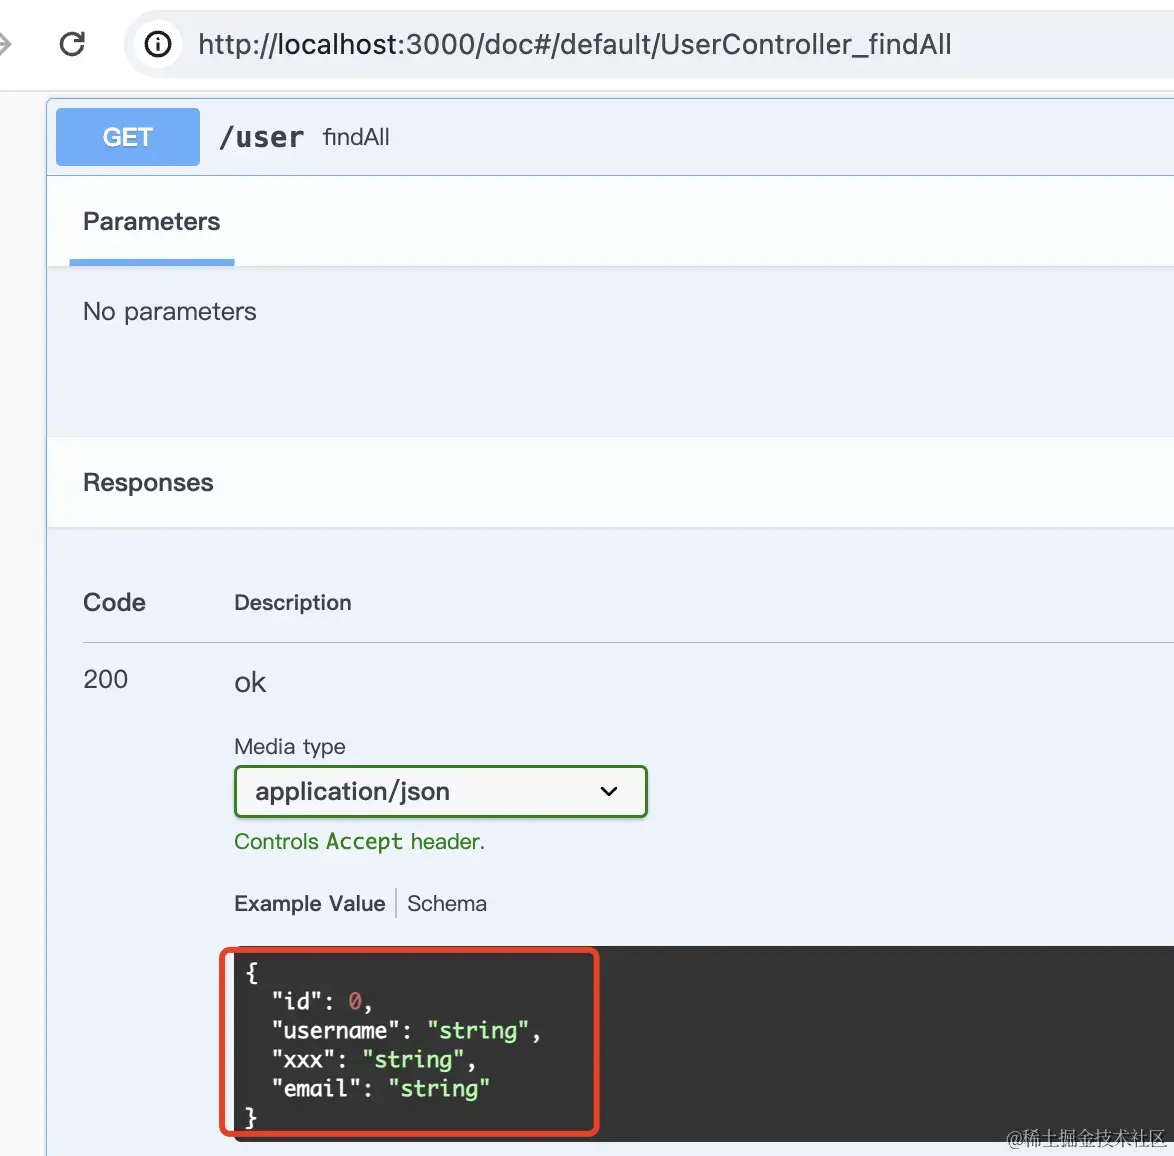
可以看到,现在的 swagger 文档是对的:
而且我们没有用 vo 对象。
这也是为什么 Nest 文档里没有提到 vo,因为完全可以用 entity 来替代。
案例代码在小册仓库
总结
后端系统中常见 entity、vo、dto 三种对象,vo 是用来封装返回的响应数据的。
但是 Nest 文档里并没有提到 vo 对象,因为完全可以用 entity 来代替。
entity 里加上 @Exclude 可以排除某些字段、@Expose 可以增加一些派生字段、@Transform 可以对已有字段的序列化结果做修改。
然后在 cotnroller 上加上 ClassSerializerInterceptor 的 interceptor,还可以用 @SerializeOptions 来添加 options。
它的底层是基于 class-transfomer 包来实现的,拿到响应对象,plainToClass 拿到 class,然后根据 class 的装饰器再 classToPlain 创建序列化的对象。
swagger 的 @ApiResponse 也完全可以用 entity 来代替 vo,在想排除的字段加一下 @ApiHideProperty 就好了。
Nest 文档里并没有提到 vo 对象,因为完全没有必要,可以直接用序列化的 entity。